
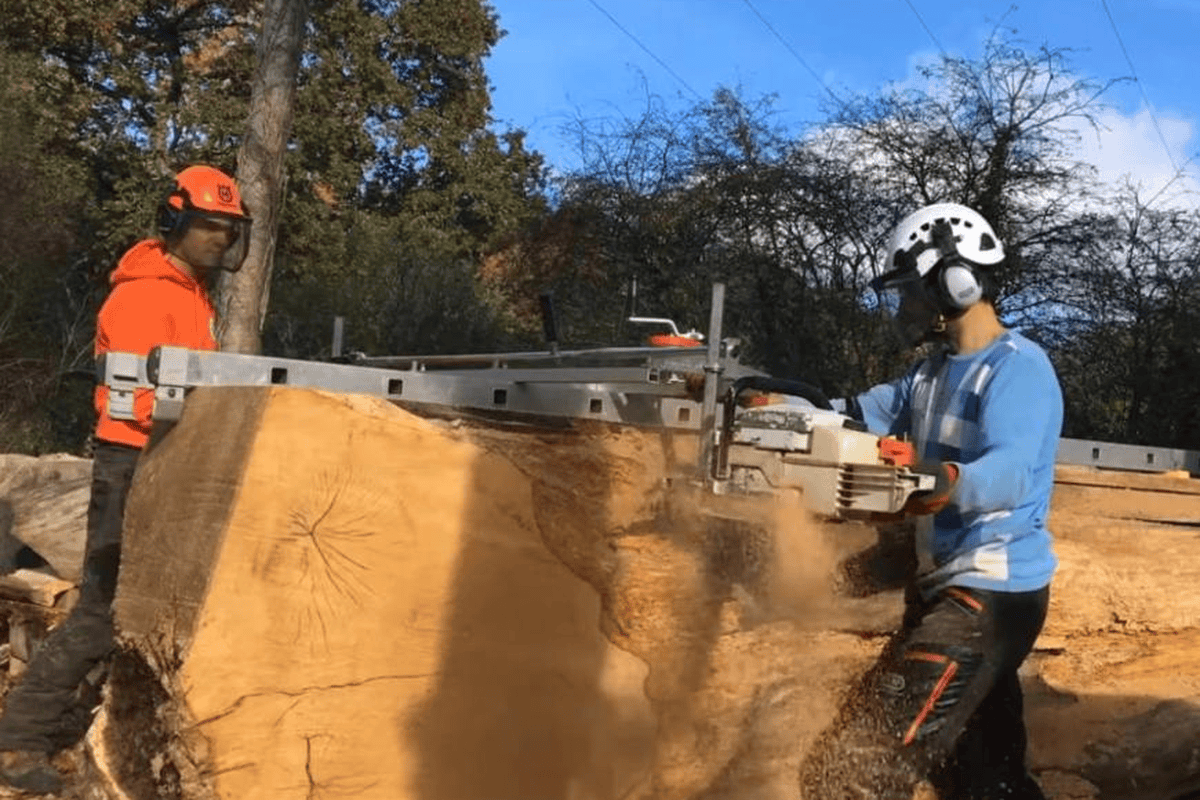
Chainsaw milling is the process of turning a raw log into flat, usable lumber by running a chainsaw through it along the grain, guided by a mill frame that controls thickness. Get three things right and you will make good boards: enough saw (realistically 70cc or more for anything past a small log), a dedicated ripping chain, and a dead-flat first cut for the mill to reference. Everything else in this guide is detail on top of those three.
At The Cut Side we run both a chainsaw mill and a Wood-Mizer LT15 bandsaw mill, so this is not theory. Jason Lewis, who has operated portable mills for more than ten years cutting upper-Midwest hardwoods, put this guide together from the mistakes and fixes that actually happen in the yard. Whether you found a walnut log too big to haul, want live-edge slabs, or just want to stop paying retail lumber prices, this is the full operator’s walkthrough — from picking a saw to stacking dry boards.
Quick Answer: To mill your own lumber with a chainsaw you need three things: a 70cc-or-larger saw, a dedicated ripping chain filed around 10 degrees, and an Alaskan-style mill frame such as the Granberg G778-36 MKIV to guide a dead-flat first cut. A realistic all-in starting budget is $1,500–$3,200 including the saw — a fraction of an entry bandsaw mill.
Last Updated: August 2026 | Jason Lewis has run portable mills for more than ten years cutting upper-Midwest hardwoods; this guide comes from that yard time.
What Chainsaw Milling Is (and Who It’s For)
Chainsaw milling converts logs into boards, beams, and slabs using a chainsaw fitted with a milling attachment that rides along the log at a set height. The mill frame clamps around the bar and references off either a guide rail or the last cut you made, so each pass produces a slab of the thickness you dialed in. The saw does the cutting; the mill just keeps it flat and parallel.
The appeal is simple: it is the cheapest way into milling your own lumber. A portable bandsaw mill starts in the thousands and needs a trailer or a dedicated spot. A chainsaw mill fits in your truck bed and can be carried to a log that fell deep in the timber. If a giant oak comes down a quarter mile back in the woods, you carry the mill to the log instead of dragging the log to the mill. That portability is the chainsaw mill’s single biggest advantage, and nothing else in the milling world touches it.
Chainsaw milling is for you if you have occasional access to logs, want slabs or a modest stack of boards, and do not mind slow, physical work. It is not the right tool if you need volume. If you are cutting dozens of logs a season, you will burn out fast and should read our complete guide to portable sawmills instead — a bandsaw mill will pay for itself in saved time. We will come back to that decision at the end, honestly, because knowing when to step up matters as much as knowing how to start.
How Chainsaw Milling Actually Works
A chainsaw mill is a metal frame that captures the chainsaw bar between adjustable guide brackets. The most common setup is the Alaskan-style mill — and worth knowing, “Alaskan mill” is actually a trademark owned by Granberg, though people use it generically the way they say “Kleenex.” The frame sets the distance between the bar and the surface it rides on, and that distance is your board thickness.
The whole process hinges on one idea: every cut references off a flat surface. Your first pass has nothing flat to ride on, so you build a temporary reference — a ladder, a pair of 2×4s screwed to the log, or a purpose-made first-cut rail. The mill rides on that rail and shaves off the rounded top of the log, leaving a flat plane behind. From then on, the mill rides on that freshly cut flat surface, and every following slab comes off parallel to it. Rinse and repeat down the log. That is genuinely all there is to the concept — the skill is in doing it flat, safe, and without wearing yourself out.
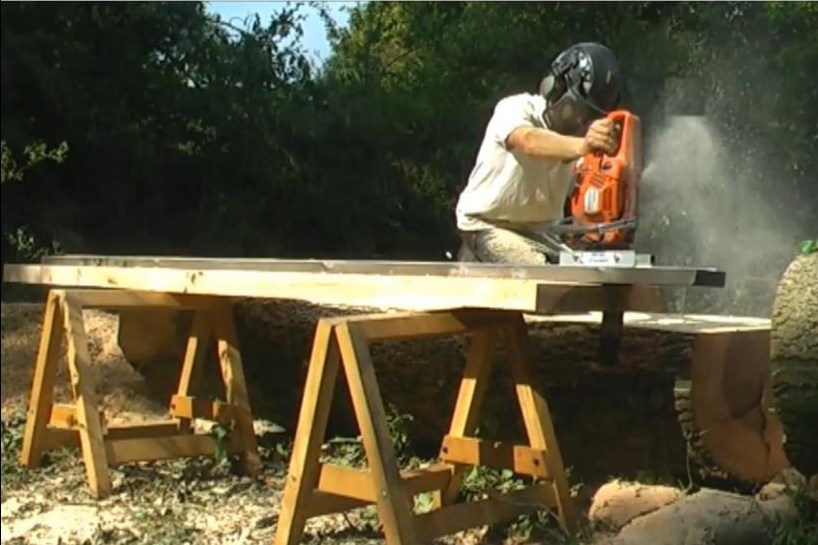
Because the saw chain removes a wide path of wood (the kerf), a chainsaw mill wastes noticeably more wood than a bandsaw mill — roughly four times the kerf width. On a big slab log you will not care. On a small log where every board counts, that waste adds up, and it is one of the quiet reasons volume sawyers move to a band. For a full picture of your options once you outgrow the chainsaw, see our portable sawmill guide.
The Saw: How Much Power You Actually Need
The single most common question we get is “will my saw work?” The honest answer is: maybe, but probably not the one in your garage. Milling is the hardest thing you can ask a chainsaw to do. You are running it at full throttle, buried in the wood, for ten minutes or more at a stretch, cutting along the grain where the wood fights back. Most saw manufacturers do not even recommend milling with their saws. That does not mean it can’t be done — it means you need the right saw and you need to baby it with fuel and cooling breaks.
A practical minimum is around 50cc with an 18-inch bar, and that only for small logs — think 12 inches and under. For anything you would call real milling, 70cc and up is the recommendation, which puts you into the professional saw class. Pro saws are built with better bearings, better cooling, and stronger components that survive the abuse. The bigger the powerhead, the better it holds full RPM through a wide cut. Here is a realistic starting point for matching saw to log:
| Log diameter | Minimum engine size | Recommended saw class | Notes |
|---|---|---|---|
| Up to 12″ | ~50cc | Homeowner/prosumer | Slow but workable; expect frequent cooling breaks |
| 12″–20″ | ~60–70cc | Prosumer/pro | The sweet spot for most hobby millers |
| 20″–30″ | ~80–90cc | Professional | Reserve power keeps cuts smooth in hardwood |
| 30″+ | 90cc+ (often 120cc) | Big pro (e.g., MS 880 class) | Wide slabs eat fuel and time; two people help |
The second half of the saw question is the bar. Standard aluminum or steel bars are fine up to about 36 inches. Past that, long bars start to sag under their own weight, which shows up as a cupped or wavy board. That is when operators move to stiffer titanium-cored bars built for milling. For most people reading this, a good 24- to 36-inch bar on a 70–90cc saw covers the vast majority of logs you will ever mill. If you want our tested picks, we cover them in best chainsaws for milling lumber.
Ripping Chain vs. Standard Chain
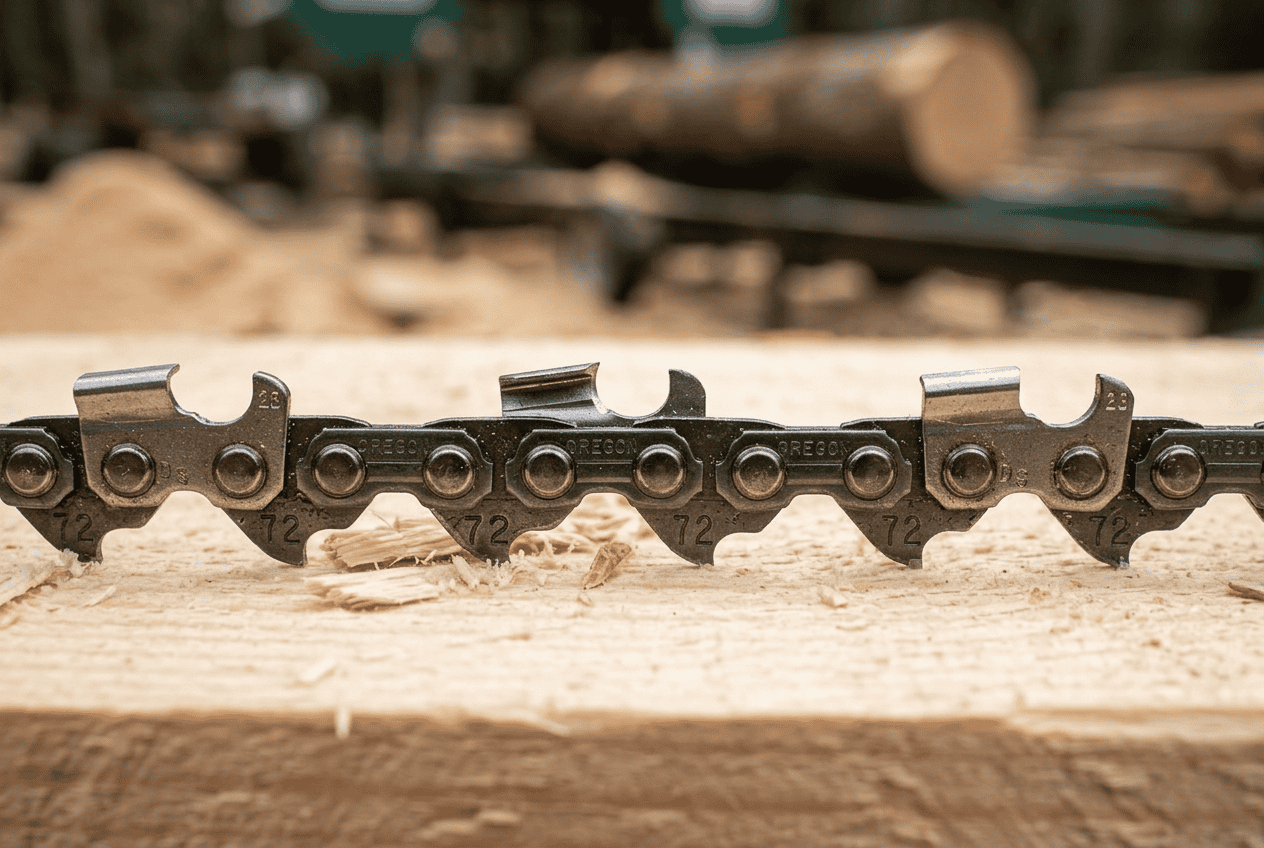
If you change one thing before your first mill, make it the chain. A standard cross-cut chain is ground to slice across the grain — that is what felling and bucking are. Milling cuts along the grain, and a cross-cut chain fights it the whole way: slow, rough, and hard on both you and the saw. A ripping chain is filed to a shallower angle so it planes the fibers instead of tearing them.
The measurable difference is the cutter angle. A standard chain is typically filed around 25–35 degrees; a ripping chain is filed much shallower, around 10 degrees. That shallow angle gives you a smoother surface and a more controlled cut along the grain. The trade-off is speed across the grain, which does not matter here because you are not crosscutting. A factory-ground example is the Oregon 72RD084G ripping chain (3/8-inch pitch, .050 gauge, 84 drive links, filed at 10 degrees) — buy two so one is always sharp. Here is the practical comparison:
| Ripping chain | Standard cross-cut chain | |
|---|---|---|
| Filed cutter angle | ~10° | ~25–35° |
| Best at | Cutting along the grain (milling) | Felling, bucking, crosscutting |
| Surface finish milling | Smoother, less sanding | Rougher, more cleanup |
| Matters most on | Bars over ~22″ | Everyday saw work |
| Cost | Slight premium; big loops over $100 | Standard pricing |
Here is the honest nuance most guides skip: a ripping chain is better, but a sharp standard chain is often good enough, especially on shorter bars and smaller logs. The ripping chain earns its keep as your bar gets longer and your slabs get wider. If you are milling occasionally on a 20-inch bar, a well-maintained standard chain will make boards. If you are running a 30-inch-plus bar in hardwood, buy the ripping chain — you will feel the difference in your shoulders by the end of the day.
The Mill, the Bar, and the Rest of the Kit
Beyond the saw and chain, the milling attachment itself is the purchase that matters most. Alaskan-style mills from Granberg are the proven standard — the Granberg G778-36 Alaskan MKIV (fits bars up to 36 inches, roughly $280) is the one most operators start with. They are, adjustable from thin boards to thick slabs, and built to clamp to your specific bar. Cheaper clamp-style mills exist and can work, but the frame’s rigidity is what keeps your boards flat, so this is not the place to buy the bargain option.
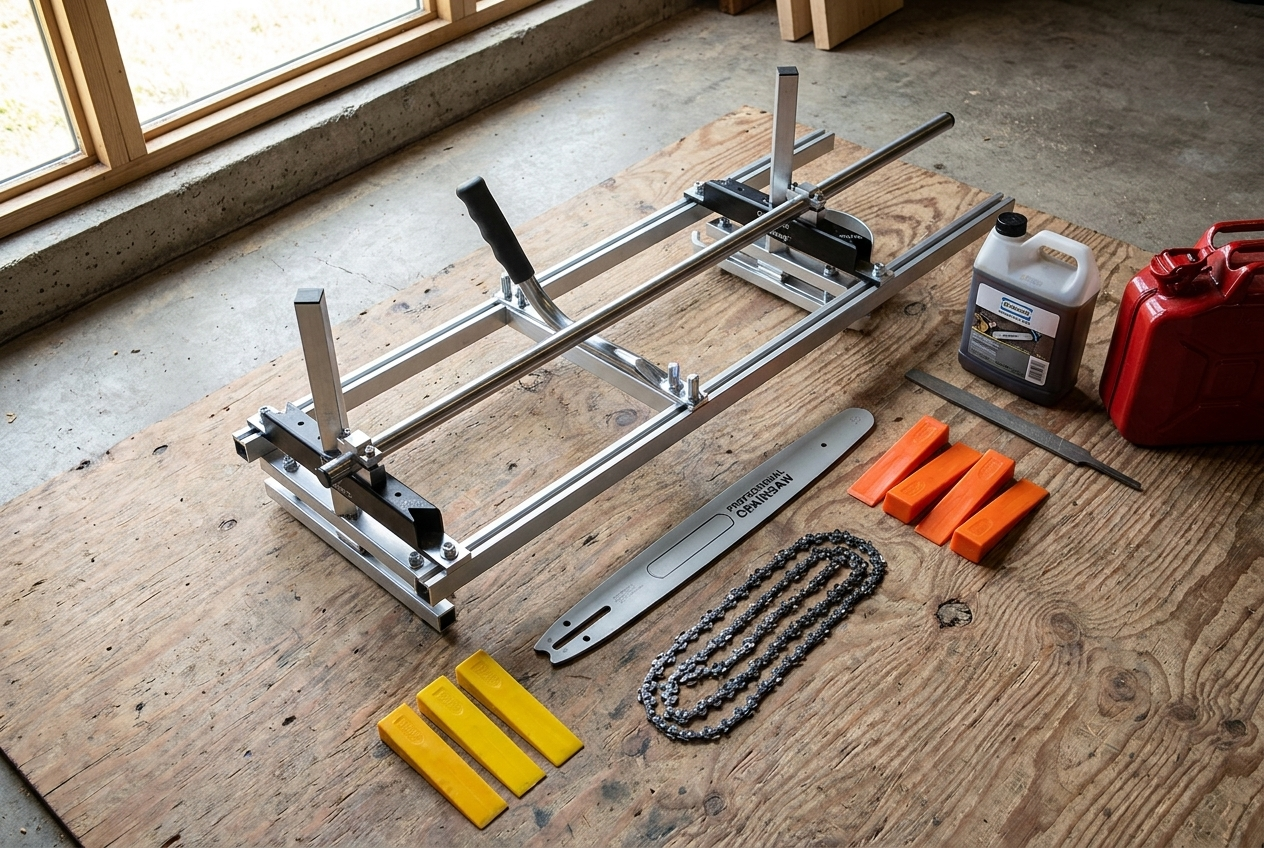
The rest of the kit is cheap and non-negotiable. You need a way to get that first cut flat: a first-cut guide rail, an aluminum extension ladder, or 2×4s screwed to the log all work. You need wedges — plastic or aluminum, several of them — to hold the kerf open as you cut so the slab’s weight does not pinch your bar. You need extra bar oil and fuel, because milling drinks both; a big saw can burn most of a tank on a single wide cut. A helper bottle of bar oil to drip on the nose sprocket of a long bar keeps the tip from cooking. And you want a cant hook or peavey to roll logs, plus something — cinder blocks, 6×6 timbers — to get the log up off the ground and stable.
Do not overlook log support. A log that shifts or rolls mid-cut is both a ruined board and a genuine danger. Block it, chock it, or drive stakes so it cannot move. We will talk more about that in safety, because it is the step beginners rush and regret.
Safety: What Actually Hurts People on a Mill
Chainsaw milling has a different risk profile than felling, and understanding that difference keeps you safe. When you are running an Alaskan mill, the bar is captured in the frame and buried in the log, and you are not cutting with the tip — so classic kickback, the number one chainsaw danger, is largely off the table. That is the good news. The bad news is that milling introduces its own hazards: fatigue, flying chips, deafening noise over long runs, and heavy slabs that can crush fingers and backs.
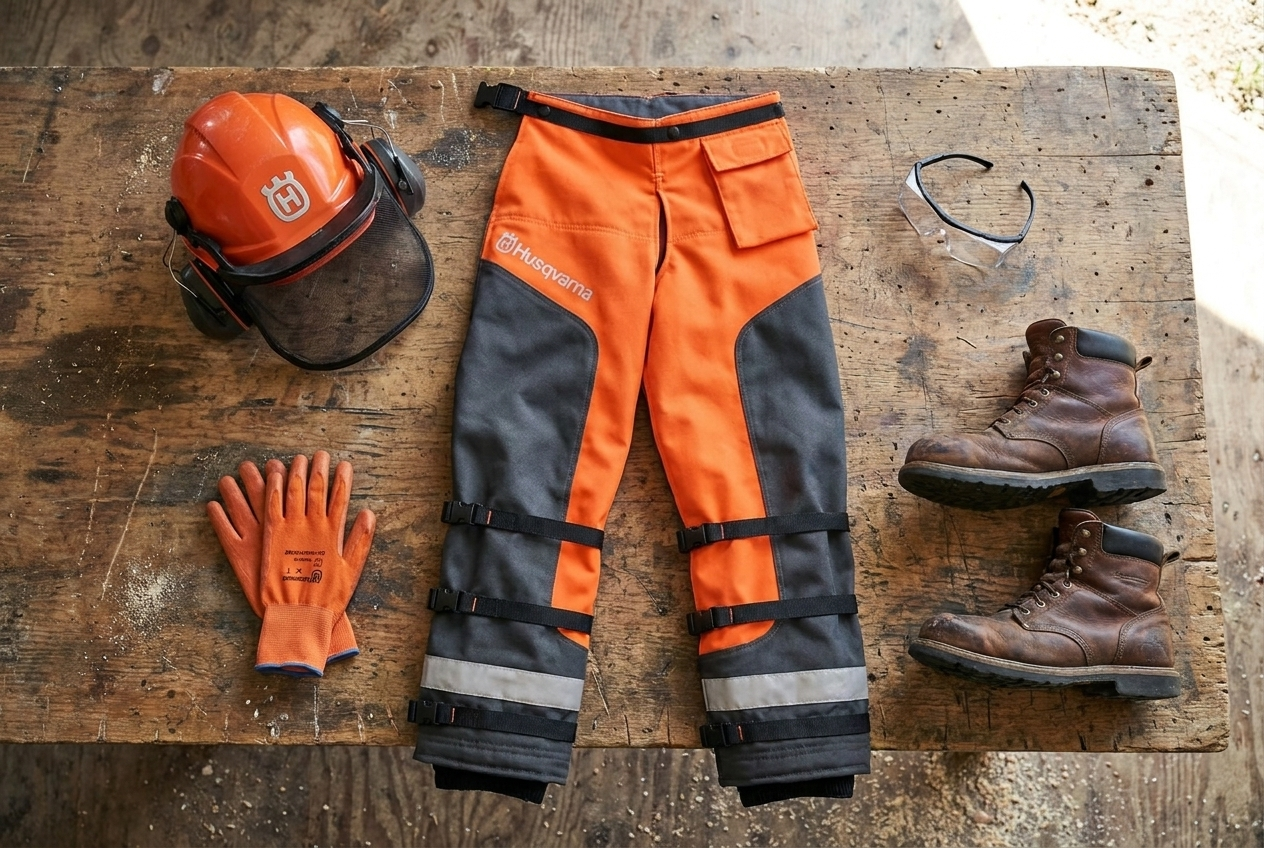
Start with the gear. Safety glasses are the bare minimum; a full-face shield is better because milling throws a constant stream of chips. Hearing protection is not optional — you are standing next to a screaming saw for ten-plus minutes per cut, and that hearing does not come back. Cut-resistant gloves, sturdy boots, and chaps round it out. Some experienced millers argue chaps matter less on a captured-bar mill, but we wear them anyway; it costs nothing and the one time it matters, it really matters. For the full breakdown, see our guide on how to stay safe with a chainsaw sawmill.
The hazards that actually put people in the ER milling are the unglamorous ones. Fatigue is first — a bogged, dull saw plus a tired operator is how mistakes happen, so take breaks and keep your chain sharp. Heavy lumber is second; a green slab can weigh several hundred pounds, and trying to muscle it alone wrecks backs. Get help or use a tractor or skid loader for the big pieces. And carbon monoxide plus fumes matter if you mill in an enclosed space — don’t. Mill outside or in a wide-open, ventilated area. Respect the pinch points too: keep hands clear of the kerf where wedges go.
Step by Step: Your First Cut to a Stack of Boards
Here is the full sequence we follow on a fresh log. Read it through once before you start your saw — the first cut sets up everything after it, so it is worth getting right.
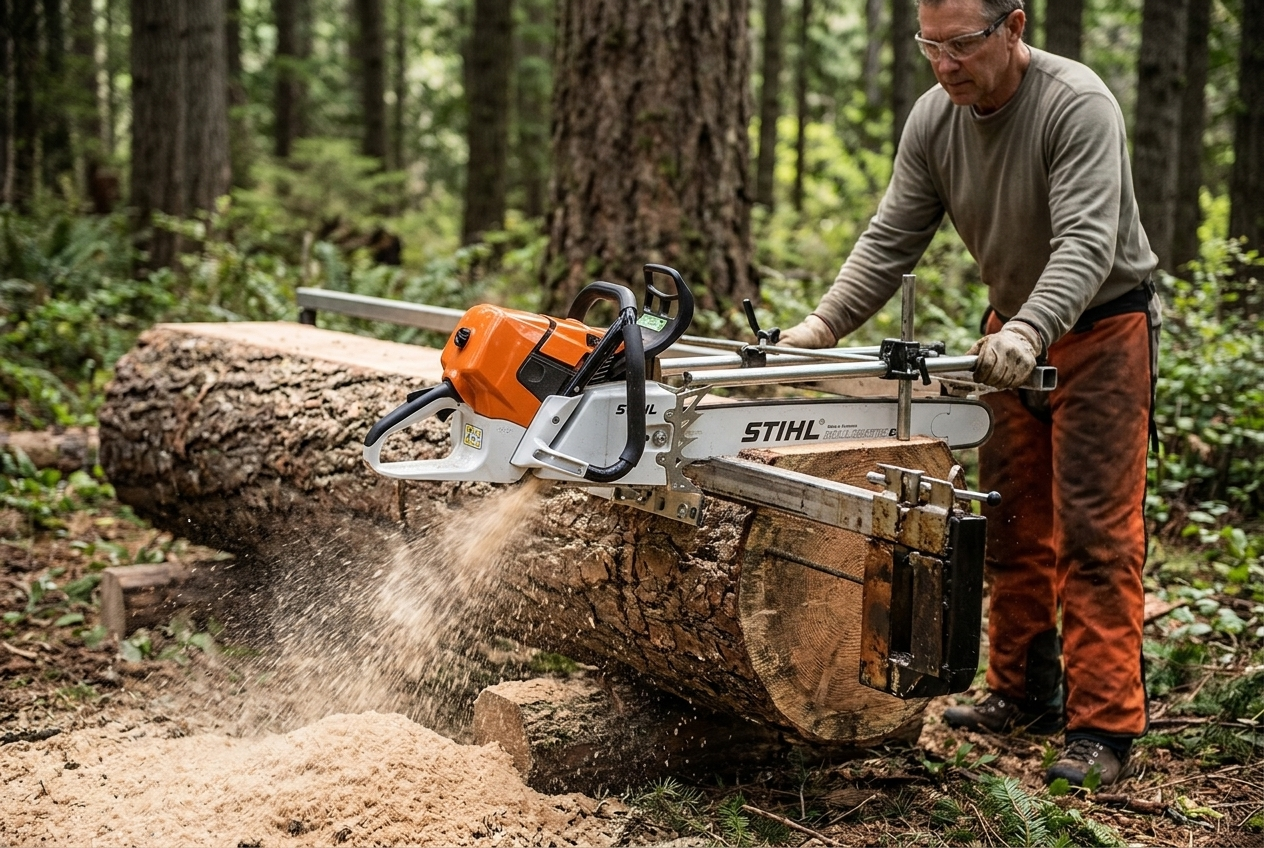
1. Prep the log. Cut off branches and knock off any loose bark, dirt, and embedded rocks near where you will cut. Grit and hidden metal dull a chain in seconds — this five-minute step saves you an hour of sharpening. Get the log up off the ground and block it so it absolutely cannot roll.
2. Set your first-cut reference. Find the straightest face of the log and mount your guide rail, ladder, or 2×4s on top. Use leveling screws or shims to get the rail flat and true along the whole length, with no twist, dip, or hump. If your rail can extend a few inches past each end of the log, do it — it makes starting and ending the cut far easier when you are solo. This step is the whole ballgame; a twisted first cut means every board after it is twisted too.
3. Make the first (reference) cut. Set the mill on the rails, start the saw, and ease into the log at full throttle. Let the chain do the work; feed slowly enough that the RPMs stay high and the chips clear the kerf. If you crank too hard, the saw bogs and the cut suffers. This first pass removes the rounded top cap of the log and leaves a flat plane behind. On a big log this cap goes to the firewood pile — no shame in it. For a deeper walkthrough of this exact step, see how to set up an Alaskan chainsaw mill for your first cut.
4. Remove the rail and set your thickness. Once you have a flat top, the guide rail comes off — you do not need it again. The mill now rides directly on that cut surface. Dial the mill to your board thickness. We usually cut slabs at 2½ inches, which leaves enough to surface flat and still finish around 2 inches after drying and planing.
5. Cut, wedge, and repeat. Run each pass the same way: full throttle, steady feed, chips clearing. As you go, drop a wedge into the kerf every couple of feet to keep the slab’s weight from pinching the bar. On long bars, drip a little bar oil on the tip sprocket every few seconds, or use an auxiliary oiler. Keep the saw fed and let it cool and refuel between long cuts.
6. Plan around the pith. The center of the log — the pith — will crack as it dries almost every time. Lay out your cuts so the pith ends up buried inside a single board you can afford to lose, or “box the heart” so it does not ruin two boards. Measure the taper of the log before you commit; a log is rarely a perfect cylinder.
7. Sticker and stack immediately. Do not leave fresh boards in a pile. Get them onto a flat, off-the-ground base with spacers between each layer (more on that next). Green wood left flat and airless molds and stains fast.
Common Mistakes and How to Fix Them
Almost every problem a new miller hits falls into a short list, and every one has a fix. Here are the ones we see most, and what causes them:
| Problem | Likely cause | Fix |
|---|---|---|
| Wavy or cupped boards | Twisted/unlevel first-cut rail, or a long bar sagging | Re-level the rail dead flat; use a stiffer bar; slow your feed |
| Saw bogs down mid-cut | Feeding too hard, dull chain, or too little saw for the log | Ease off, sharpen or swap chain, let RPMs recover |
| Bar pinches / gets stuck | Kerf closing under the slab’s weight | Drive wedges every couple feet as you cut |
| Chain dulls almost instantly | Dirt, bark grit, or hidden metal in the log | Clean the log first; keep a spare sharp chain ready |
| Rough, fuzzy surface | Standard chain instead of ripping chain | Switch to a properly filed ripping chain |
| Boards crack and check as they dry | Drying too fast; pith left in the board | Slow the drying, seal ends, box the heart |
| Bar overheats on long cuts | Not enough tip lubrication on a long bar | Add an auxiliary oiler or drip oil at the nose |
If wavy cuts are your specific headache — and they are the most common complaint — the same diagnostic logic applies whether you are on a chainsaw mill or a band. Our deep dive on how to fix wavy cuts on a bandsaw mill walks through the causes in detail, and most of them (feed rate, dull cutters, an unlevel reference) translate directly.
Drying What You Cut
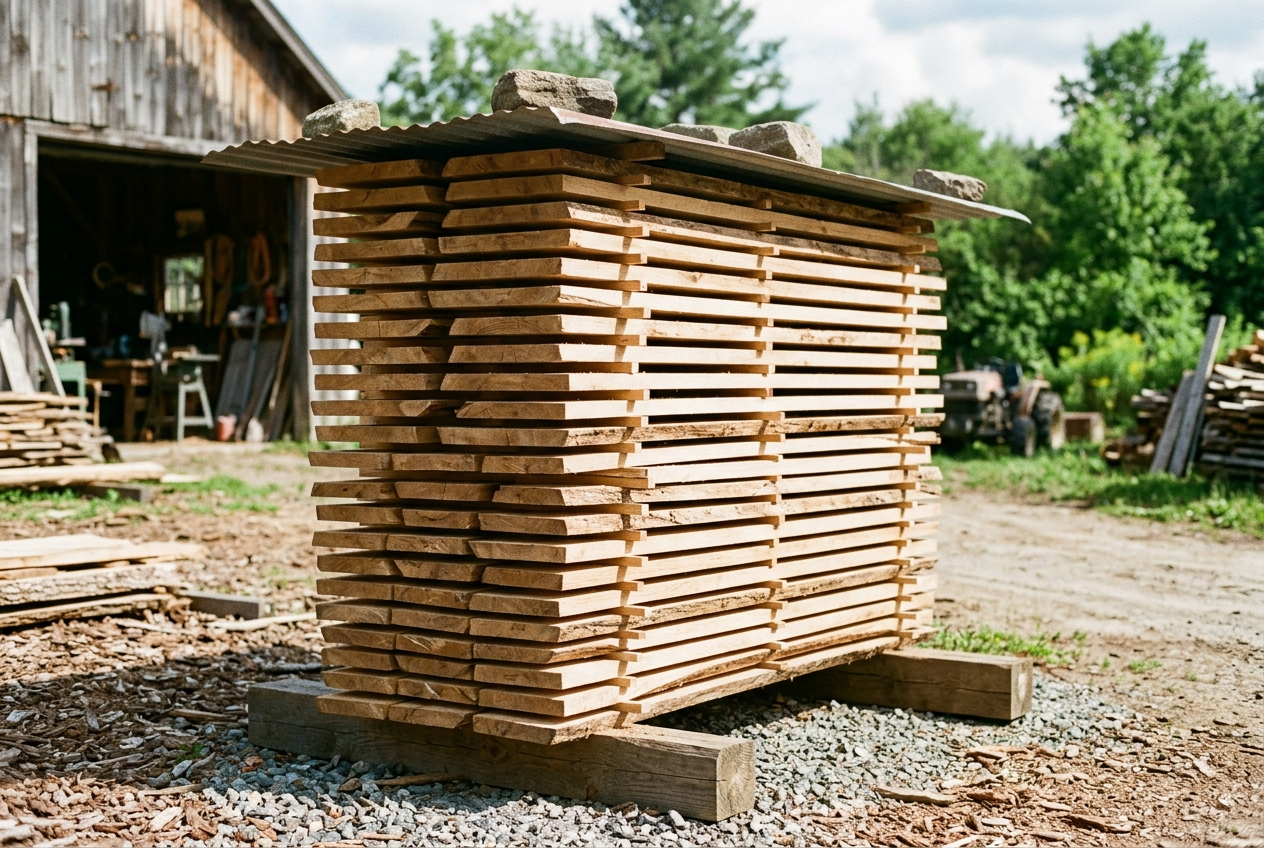
Here is the part beginners underestimate: milling the log is the easy half. Drying it correctly is where most home-milled lumber gets ruined. Freshly cut “green” wood is full of moisture, and it has to come out slowly and evenly or the board warps, twists, cracks, or case-hardens. Get this wrong and all that milling work goes to the burn pile.
Wood holds two kinds of moisture: free water sitting between the cells, which leaves quickly, and bound water locked inside the cells, which takes far longer. Your goal is to bring the board down to a moisture content that is stable for its end use — roughly 12–14% for air-dried lumber in most climates, and around 7% for kiln-dried stock headed for fine furniture indoors. Do not guess at this — a pinless meter like the General Tools MMD4E moisture meter (measures 5–50% in wood, about $38) tells you exactly when a board is ready to use. The governing rule of thumb is one year of air drying per inch of thickness. A 2½-inch slab is a two-to-three-year wait if you air dry it. That is not a typo, and it is why a lot of millers air dry for a year to shed the free water, then pay to have it finished in a kiln.
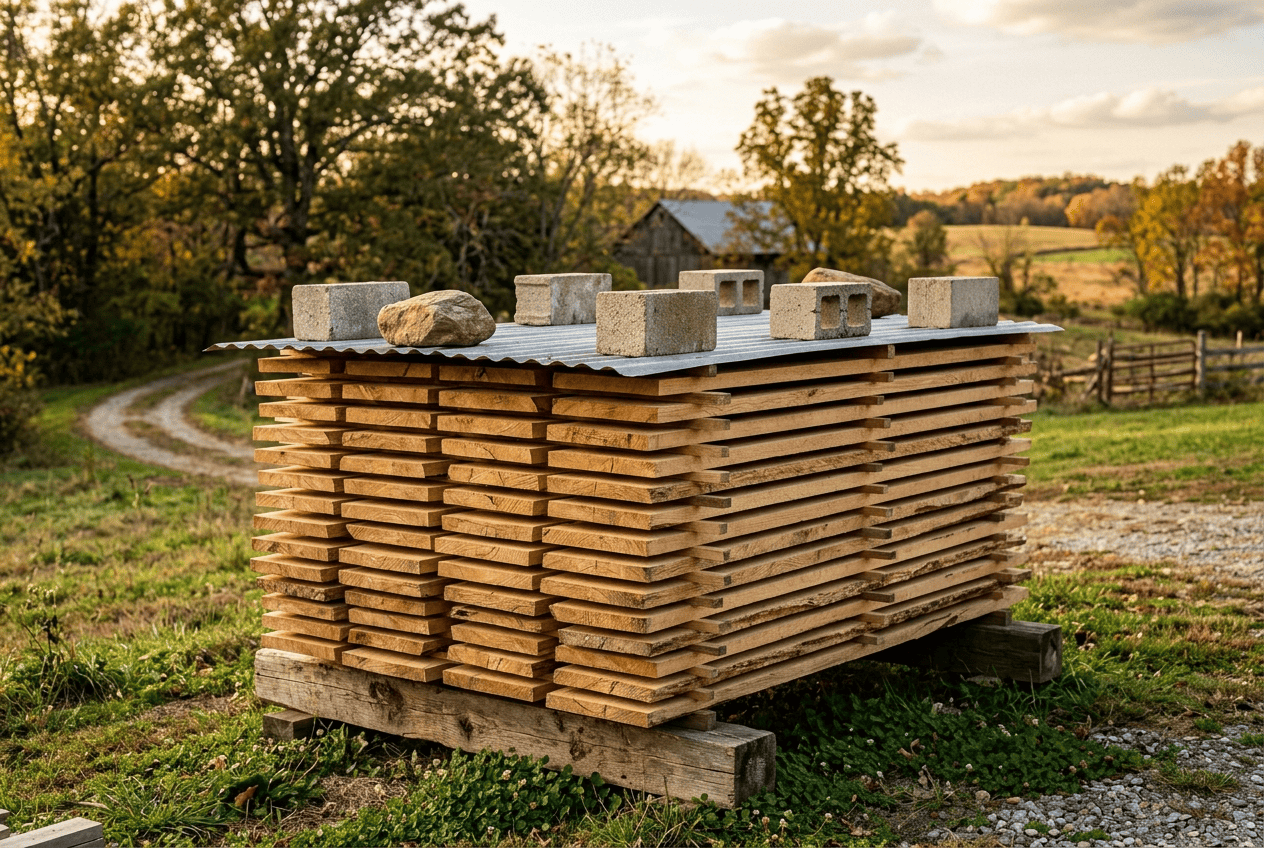
The mechanics that make or break a drying stack are simple but unforgiving. Pick a shaded, breezy spot — not baking in full sun, not dead-still against a building. Build a flat, level base on cinder blocks or 6×6 timbers, because the stack will “remember” any twist in the base. Separate every layer with stickers — dry spacers about an inch square — placed in vertical columns directly above one another, roughly every 16–18 inches along the length, with the end stickers right at the board ends. Stack the heaviest, most warp-prone species (oak, elm, sycamore) with extra weight or straps on top to hold them flat, and seal the board ends to stop them cracking. Species like oak specifically want low and slow; cover the top of the pile to block UV and rain while still letting air move through.
If you plan to do much of this, drying is worth its own study — it is the difference between lumber you can build with and expensive firewood. Kiln drying, when you outsource it, typically runs somewhere around 50 cents to a dollar per board foot depending on your area and the kiln.
What It Costs to Get Started
The reason people choose chainsaw milling is the low cost of entry, and it holds up. Here is a realistic budget, assuming you are buying a saw specifically for milling:
| Item | Budget | Notes |
|---|---|---|
| Powerhead (chainsaw) | ~$1,000–$2,000 | 70–90cc pro saw; clone saws cost less, unknown longevity |
| Mill + milling bar (Granberg) | ~$500–$1,100 | Frame plus a proper milling bar |
| Ripping chain(s) | ~$30–$100+ each | Buy two so one is always sharp |
| Wedges, oil, fuel, cant hook | ~$100–$200 | Consumables and log-handling basics |
| All-in to start | ~$1,500–$3,200 | Versus several thousand-plus for an entry bandsaw mill |
Put that next to the numbers and it is a genuinely good deal if you have access to logs. Dried, flattened live-edge slabs sell for real money — often well over $10 a board foot in the right market — and a single decent log can yield a stack of them. The gear pays for itself faster than most people expect if you are milling wood you would otherwise buy or burn. For how those costs compare to stepping straight to a band, we broke it down in how much a portable sawmill costs.
Is Chainsaw Milling Worth It? An Honest Verdict
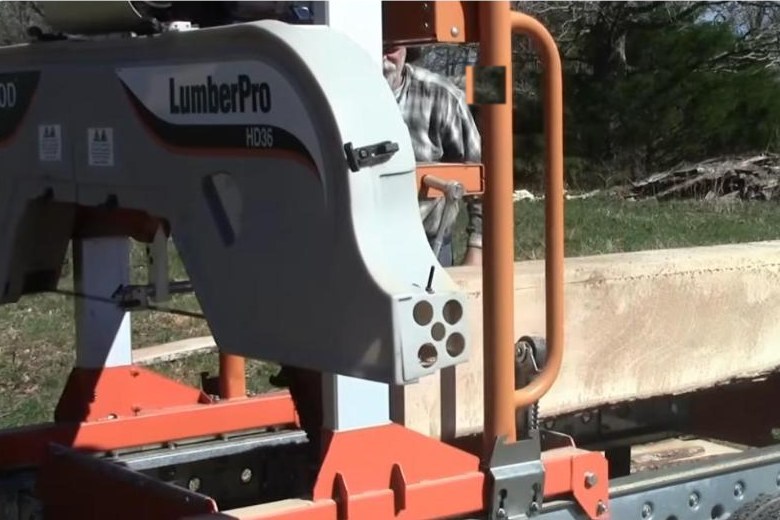
Yes — with clear eyes about what you are signing up for. Chainsaw milling is absolutely worth it if you value low entry cost, portability, and the ability to mill oversized logs no small bandsaw mill can swallow. You can buy an 84-inch bar-and-mill combo and cut slabs wider than almost any commercially available bandsaw mill will handle. For the occasional slab hunter or the person with a few nice logs and a weekend, nothing beats it on cost.
From experience: I expected the bandsaw mill to be faster — what actually surprised me was how much better the lumber came off it. Straighter, smoother cuts, far less wood lost to kerf, and no more losing half the day to chain sharpening, refueling, and cleaning up rough cuts. The chainsaw mill still wins when a log is too big or too buried to move; once you’re producing regular lumber, the bandsaw is an entirely different process.
But we owe you the drawbacks, because they are real. Chainsaw mills are slow — most cuts run over ten minutes, where our LT15 bandsaw makes the same cut in under a minute. They waste more wood to that fat kerf. They are physically punishing, and to be truly efficient you really want two or three people working together. And they are hard on saws, chains, and your back. It is a fantastic way to start and a fantastic complement to a bandsaw mill, but it is not a volume tool.
The honest decision rule we give people: if you are milling a handful of logs a year, or you need to break down monster logs, keep the chainsaw mill — it is the right tool. If you find yourself milling most weekends, chasing production, or dreading the setup, that is the signal to step up to a portable bandsaw mill. Many operators, us included, run both: the band for volume and clean boards, the chainsaw mill for the giants and the far-back logs. If you are weighing that jump, our best portable sawmill for the money breakdown is the next thing to read.
Frequently Asked Questions
How big a chainsaw do I need for milling? For anything beyond small logs, plan on 70cc or more. A 50cc saw with an 18-inch bar can handle logs up to about 12 inches, slowly, but for real milling a professional-class 70–90cc saw holds power through the cut and survives the abuse far better.
Do I really need a ripping chain? A ripping chain (filed around 10 degrees versus 25–35 for a standard chain) gives smoother cuts along the grain and less strain, and it matters most on bars over about 22 inches. A sharp standard chain will make boards on smaller logs, but if you are milling regularly or running a long bar, the ripping chain is worth it.
How long does it take to mill a log? Expect roughly 10 to 15 minutes per cut on a moderate log with a strong saw, and longer with a smaller saw or a wider log. A single log with several slabs is an afternoon’s work — milling is deliberate, not fast.
Should I mill logs green or dry? Mill green. Fresh logs cut easier and have not yet built the internal stress and splits that come with drying. Do your milling soon after the tree comes down, then dry the boards — not the log.
How long does milled lumber take to dry? The rule of thumb is one year per inch of thickness for air drying, so a 2½-inch slab can take two to three years. Many people air dry for a year to release the free moisture, then finish in a kiln to reach furniture-ready moisture content of around 7%.
Getting Started
Chainsaw milling rewards patience and punishes shortcuts, and that is the whole lesson. Nail the three fundamentals — enough saw, a ripping chain, and a flat first cut — wear your gear, respect the drying, and your first log will give you boards you will be proud of. Start with a small, clean log and a simple slab. Each cut teaches you something the next one uses.
When you are ready to pick your saw, dial in your setup, or decide whether it is time to move up to a bandsaw mill, The Cut Side has the operator-tested guides to get you there. Explore our chainsaw milling gear picks and the rest of the milling library, and go make some sawdust.
Featured image: still frame from “Alaskan chainsaw mill double ended milling massive oak Romsey” by Alaskan Mill, YouTube (CC BY).