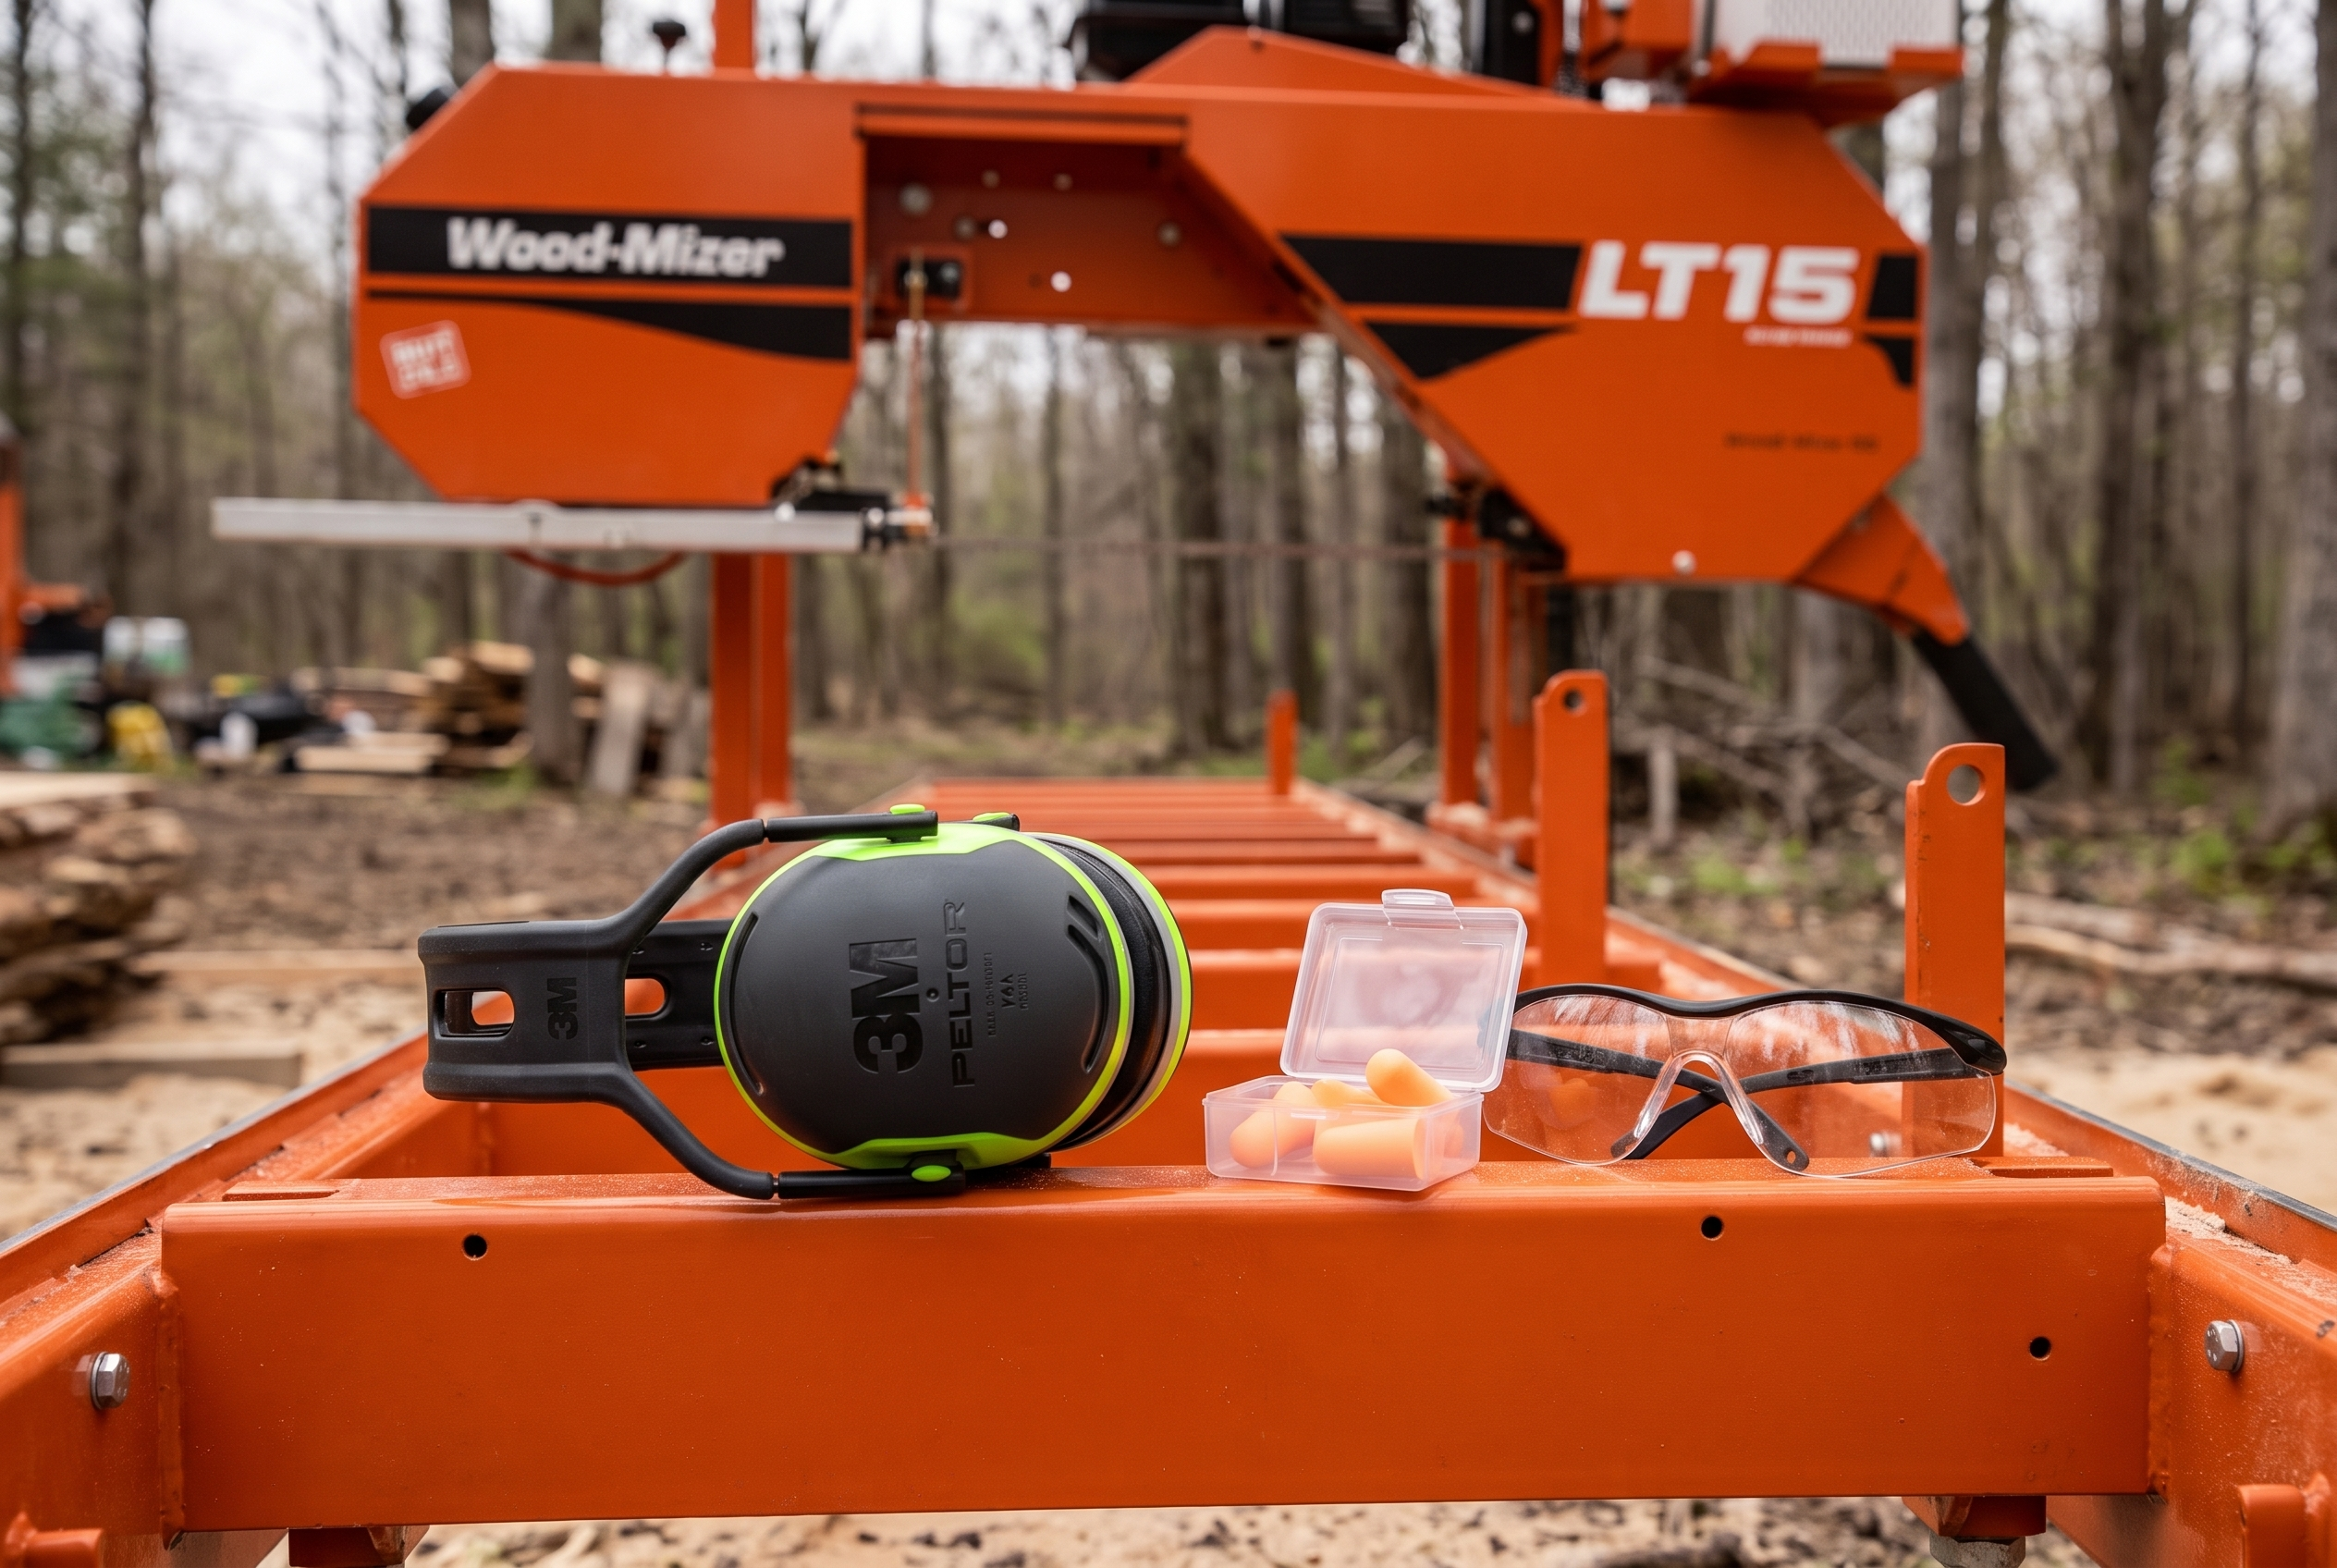
The closest I have come to a serious injury in more than ten years of running a portable mill did not involve the blade. It was a 24-inch red oak log that rolled off the loading ramps while I was standing on the wrong side of it. I got a bruised shin and a lesson. That is the thing about sawmill safety: the blade gets all the attention, but the log yard, the loading ramps, and the fatigue at the end of a long day are where most operators actually get hurt. This sawmill safety guide covers the PPE we actually wear at our mill, the operating procedure we follow on our Wood-Mizer LT15, what OSHA says, and the habits that keep a one- or two-person operation intact.
Quick Answer: Sawmill safety comes down to four things: wear the right PPE every time (ANSI Z87.1 eye protection, hearing protection rated for 90+ dBA equipment, steel-toe boots, snug gloves, and ASTM F1897 chaps or pants whenever a chainsaw is running); handle logs with tools and gravity on your side, never standing downhill of a log that can roll; keep the blade guarded and the mill shut down and de-energized before you clear a jam, change a blade, or reach into the cut path; and run a short pre-start inspection every single day. OSHA’s sawmill standard (29 CFR 1910.265) applies to employers, but the procedures in it are the right baseline for any operator.
Sawmill safety is the set of PPE, log-handling, and lockout habits that keep a sawyer out of the four injury paths a mill offers — blade contact, rolling or falling logs, thrown debris, and noise — and it starts before the engine does: on a bandsaw mill the blade runs at roughly 5,000 feet per minute, faster than any reaction you have.
Last Updated: September 2026 | Jason Lewis has spent ten-plus years running a Wood-Mizer LT15 on upper-Midwest hardwoods — the PPE list, log-handling rules and pre-start checklist here are what actually gets used at his mill, checked against OSHA 1910.265.
Why Sawmill Safety Is Different From Shop Safety
OSHA calls sawmill work one of the most dangerous occupations in the United States, and the reason is not just that the blade is sharp. It is the combination of massive weights, rolling and sliding logs, moving machinery, wood dust, and, for portable operators, rough terrain and job sites that can be an hour from an emergency room. According to OSHA’s sawmill overview, the common injuries are lacerations, amputations, severed fingers, and blindness, with wood dust causing skin and respiratory problems on top of that. Log handling and blade contact account for the largest share of serious injuries.
A woodshop has a level concrete floor, a dust collector, and a hospital ten minutes away. A portable mill is often set up on a customer’s back forty, on ground that has never been level, with a pile of 2,000-pound logs waiting to be rolled onto the bed. I am Jason Lewis, and I have run portable mills in the upper Midwest for over a decade, mostly hardwoods on a Wood-Mizer LT15. Everything in this guide comes from that experience, checked against OSHA’s standards and the manufacturer manuals. The goal is not to scare you off. It is to give you a system you can actually follow when you are tired, behind schedule, and tempted to skip a step.
The hazards, in the order they tend to hurt people, are:
- Log handling: crush and struck-by injuries during unloading, rolling, and loading onto the bed.
- Blade contact: reaching into the cut path, clearing a jam with the engine running, or handling a blade bare-handed.
- Chainsaw injuries: kickback and leg contact while bucking, trimming, or chainsaw milling at the mill site.
- Entanglement: loose clothing, drawstrings, or gloves caught in belts, drive wheels, or the blade.
- Hearing loss: slow, permanent, and almost universal among operators who skip muffs.
- Dust, fuel, and fire: respiratory problems from sawdust, plus fire risk from fuel, hot exhaust, and dust buildup.
- Environment: uneven ground, wet or icy footing, heat, cold, and fatigue.
The Sawmill PPE Checklist: What We Actually Wear
Every safety article lists PPE. Very few tell you what an operator actually puts on at 7 a.m. Here is our checklist, with the standard each item should meet and when it is non-negotiable. Print this if you run a crew.
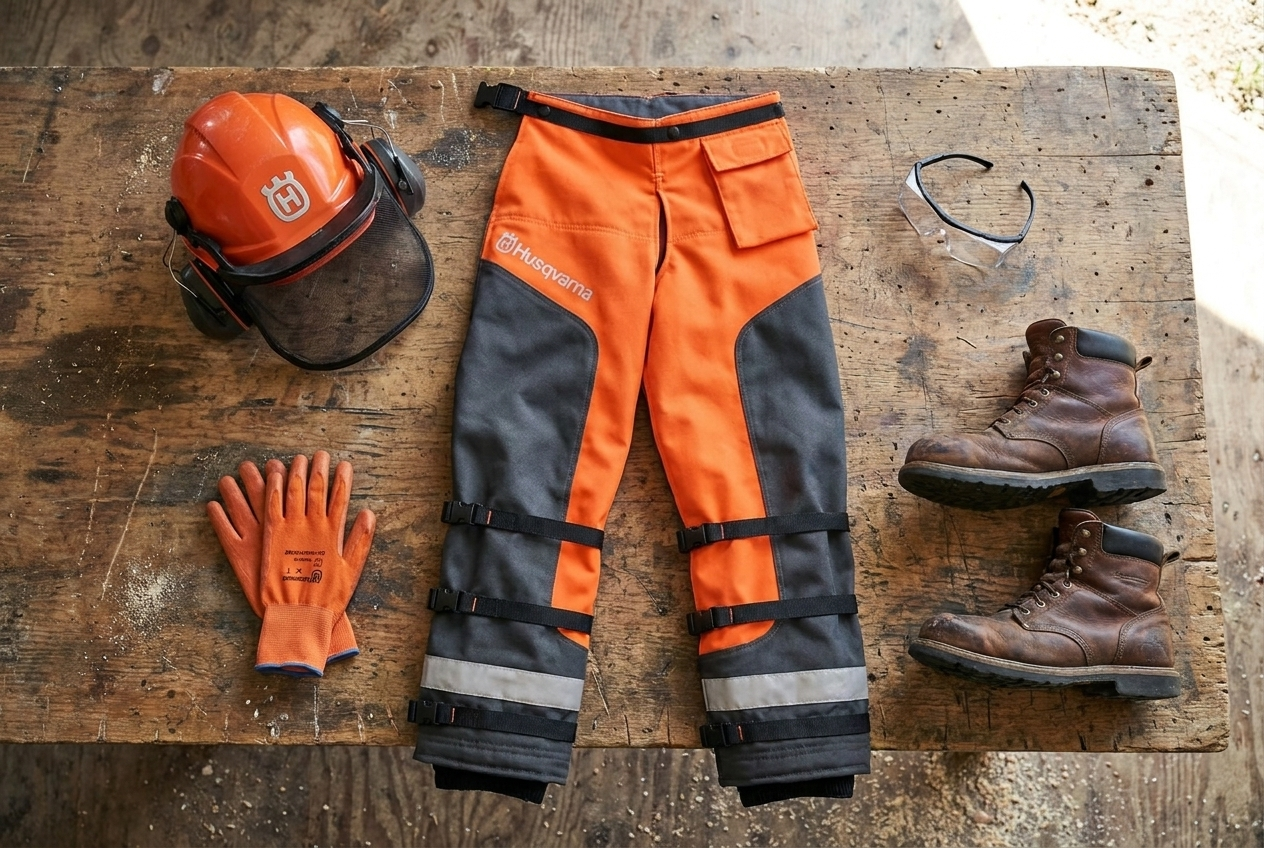
| PPE Item | Standard to Look For | When It Is Required | What We Run at Our Mill |
|---|---|---|---|
| Safety glasses or goggles | ANSI Z87.1 (Z87+ for impact) | Any time the mill or a saw is running; any time you are within 25 feet of one | Wraparound Z87+ glasses; goggles when milling frozen logs in winter (ice chips) |
| Hearing protection | NRR 25 or higher (earmuffs or plugs); double up (plugs + muffs) around chainsaws | Whenever the engine is running, including idling next to it | NRR 27 muffs on the helmet for saw work; separate NRR 25+ muffs at the bandsaw mill |
| Steel- or composite-toe boots | ASTM F2413 (look for I/75 C/75 impact and compression rating) | Always in the log yard and at the mill | 8-inch lace-up steel-toe with lug soles; waterproof for spring mud |
| Gloves | Snug leather or cut-resistant (ANSI/ISEA 105 rated) for log and blade handling | Log handling, blade changes, stacking lumber. Remove loose gloves near rotating parts. | Snug goatskin work gloves; ANSI A4 cut-resistant gloves for handling bandsaw blades |
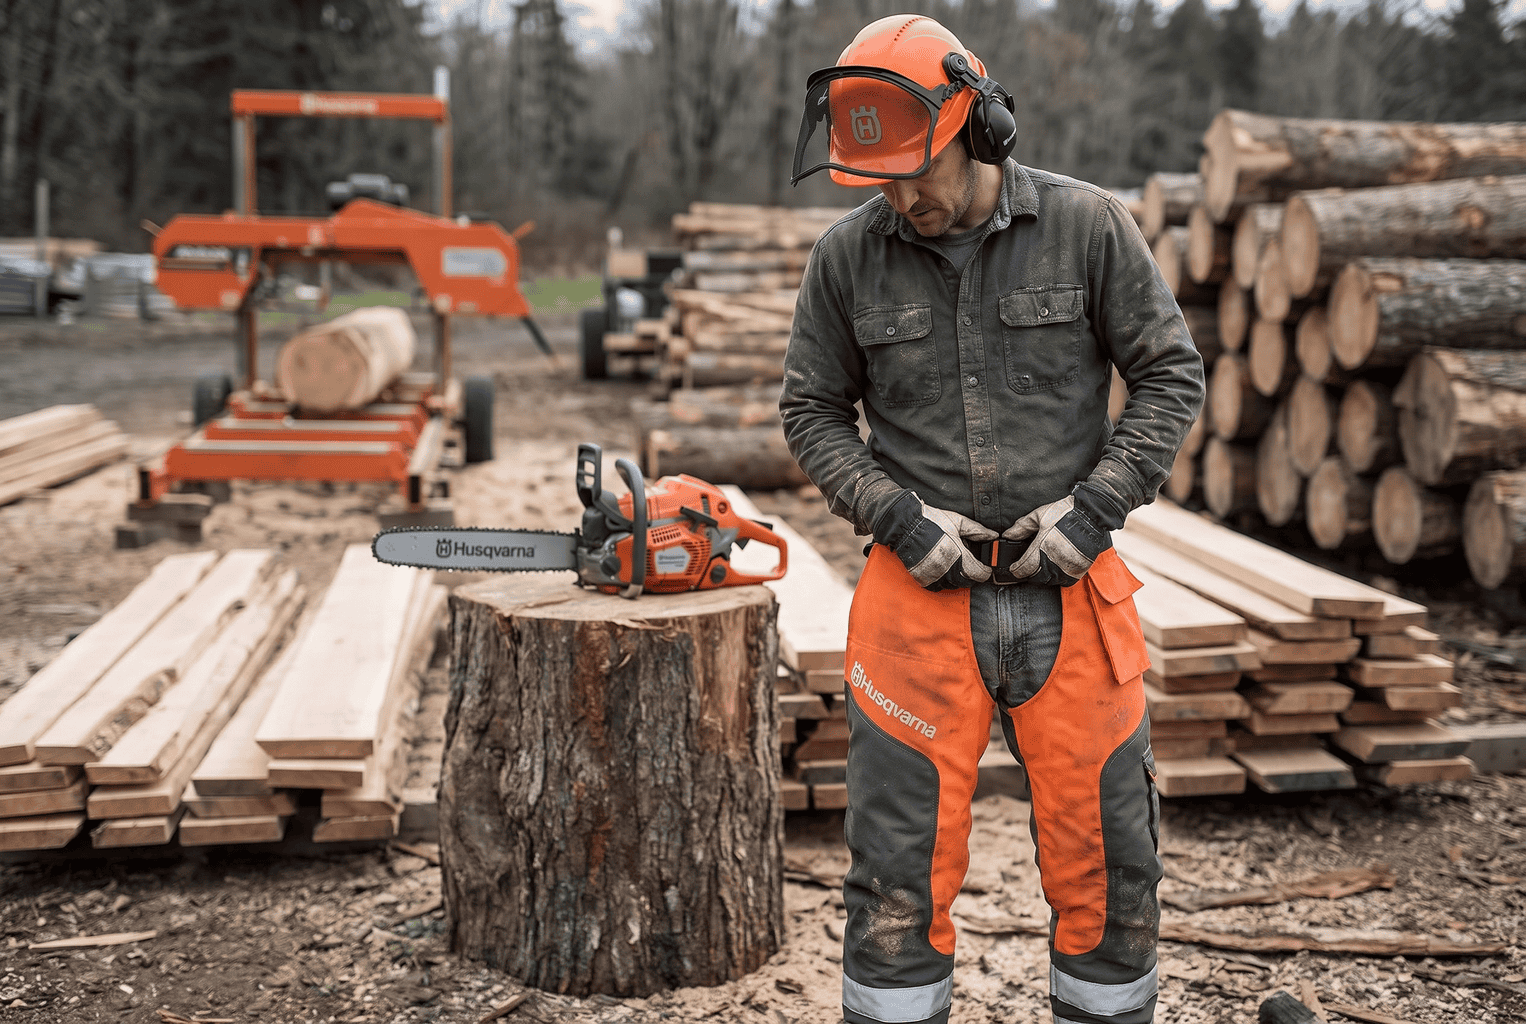
| Chainsaw chaps or pants | ASTM F1897 (US) leg protection | Any time a chainsaw is running: bucking, trimming, chainsaw milling | Wrap-around chaps for bucking; full-wrap pants on long chainsaw-mill days |
| Helmet with face shield | ANSI Z89.1 helmet; Z87.1 shield | Chainsaw work, and any log handling where a log could roll or a cant hook could slip | Forestry helmet system with mesh shield and integrated muffs |
| Respiratory protection | NIOSH-approved N95 minimum | Dry hardwoods, dusty species (walnut, cedar, spalted anything), indoor or enclosed milling, sharpening | N95 for most days; half-face respirator with P100 filters for walnut and cedar |
| Fitted, tucked-in clothing | No standard; long sleeves, no drawstrings, no loose cuffs | Always. Belts, drive wheels, and blades grab anything loose. | Long-sleeve work shirt tucked in, no hoodie strings, sleeves buttoned |
| High-visibility vest or shirt | ANSI/ISEA 107 Class 2 if you are around loaders or trucks | Any job with a skid steer, tractor, or log truck moving in the yard | Orange Class 2 vest on any two-machine job |
A couple of notes from experience. First, the glasses are the item people cheat on most, because they fog. Buy anti-fog lenses and keep a spare pair in the truck. A bandsaw blade throws sawdust and the occasional chip of metal from a nail-embedded log directly at your face, and I have had a piece of a fencing staple hit my lens. Second, gloves are a judgment call around the running mill. We wear snug gloves for log handling and stacking, but if you are adjusting anything near the drive belt, a loose glove is worse than no glove. Third, chaps are not just for felling. Chainsaw milling means a saw running at full throttle for minutes at a time with your legs right next to the bar. We covered the chainsaw-specific side of this in our guide on how to stay safe with a chainsaw sawmill.
Hearing Protection: The Injury You Will Not Notice Until It Is Permanent
Noise is the hazard every operator underestimates because it does not bleed. OSHA’s permissible exposure limit under 29 CFR 1910.95 is 90 dBA as an 8-hour time-weighted average, and a hearing conservation program is required for employees once exposure hits 85 dBA. OSHA uses a 5 dB exchange rate, which means every 5 dB increase cuts your allowable exposure time in half: 8 hours at 90 dBA, 4 hours at 95, 2 hours at 100, and so on down to 15 minutes at 115 dBA.
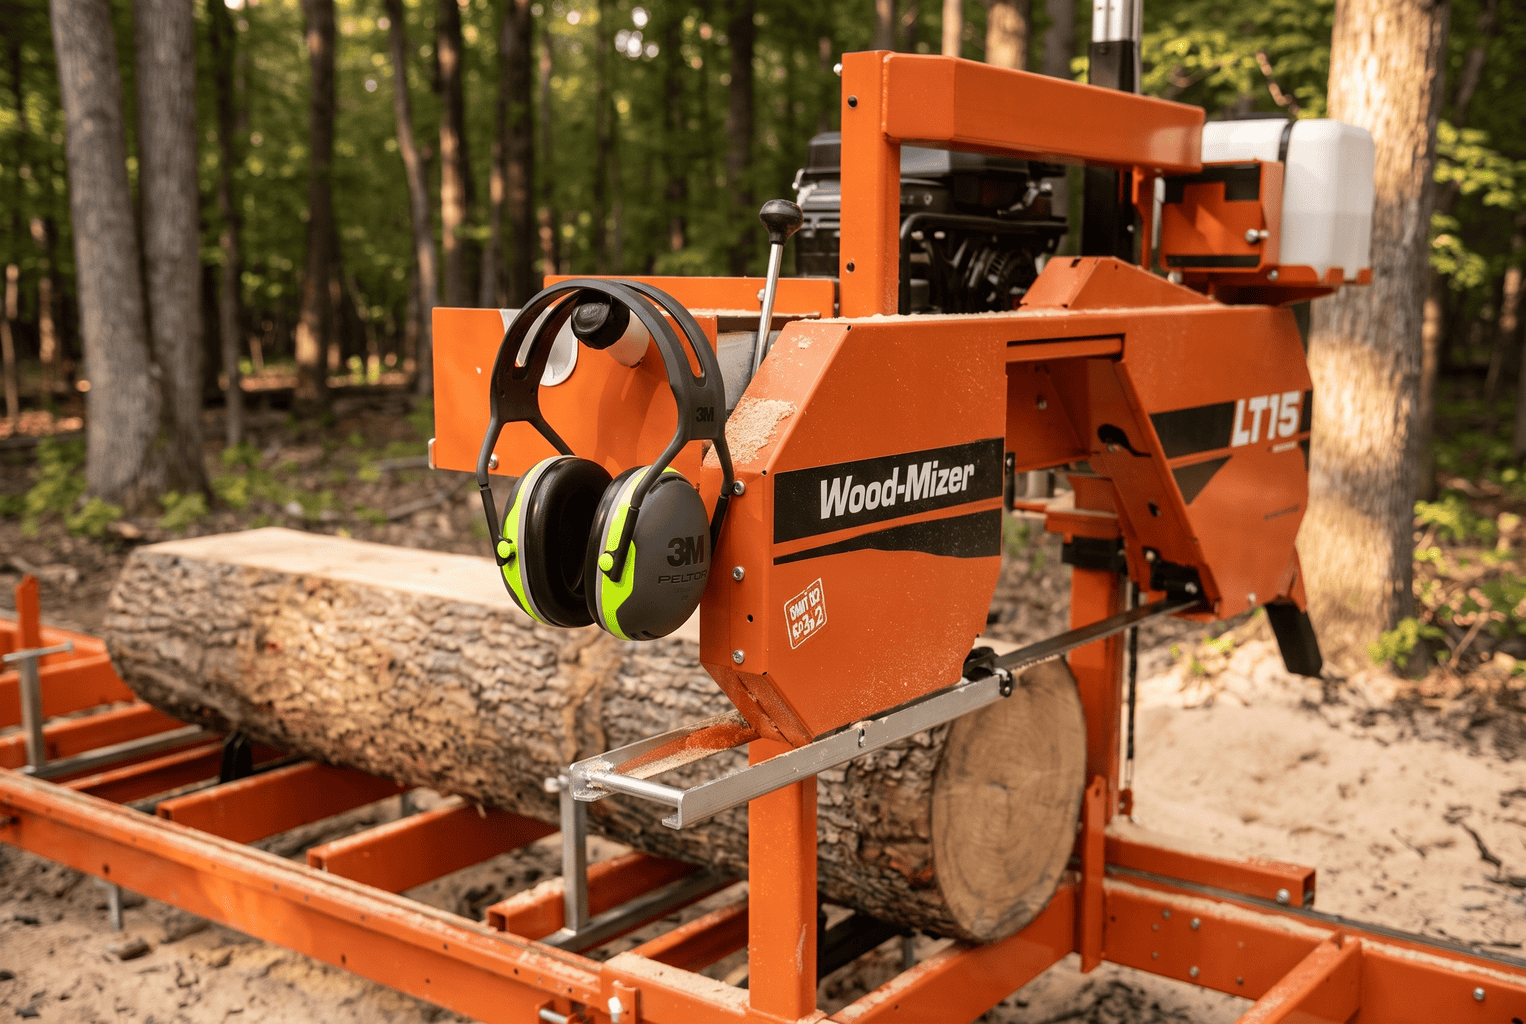
A gas bandsaw mill runs in the mid-90s to around 100 dBA at the operator’s position, depending on the engine, and a 70cc-plus chainsaw at full throttle runs around 105 to 115 dBA at the ear. Do the math against that exchange rate and you can see why a full day of milling without muffs is well past the limit. At our mill, hearing protection goes on when the engine starts and comes off when it stops, and we double up with foam plugs under muffs on chainsaw-milling days (3M E-A-R Classic, NRR 29; a box of them lives in the truck, and these are the ones). At the bandsaw mill, where there is no helmet, a set of over-the-head muffs like the 3M Peltor X4A (NRR 27, slim cups that do not bump the guard when you lean in) hangs on the sawhead; this is the same one on Amazon. The X4 cups also come in a hard-hat-mount version (the X4P51E) if you run a helmet at the mill, but the over-the-head headband is the one for a bare-headed bandsaw operator. If you are running a crew, a $30 sound-level meter app is not a legal noise survey, but it will tell you quickly whether you are in the 85+ range, and you will be.
Log Handling: Where Most Sawmill Injuries Actually Happen
A green red oak log 24 inches in diameter and 10 feet long weighs roughly 2,500 pounds. It does not care that you are experienced. The rules we follow for moving logs are simple, and they exist because each one is written on somebody’s X-ray.
- Never stand downhill of a log that can roll. Not to set a cant hook, not to eyeball a cut, not for a second. If the ground slopes, the log will follow gravity the instant it is free. Work from the uphill side, and chock logs on the deck with wedges or blocks before you touch anything else.
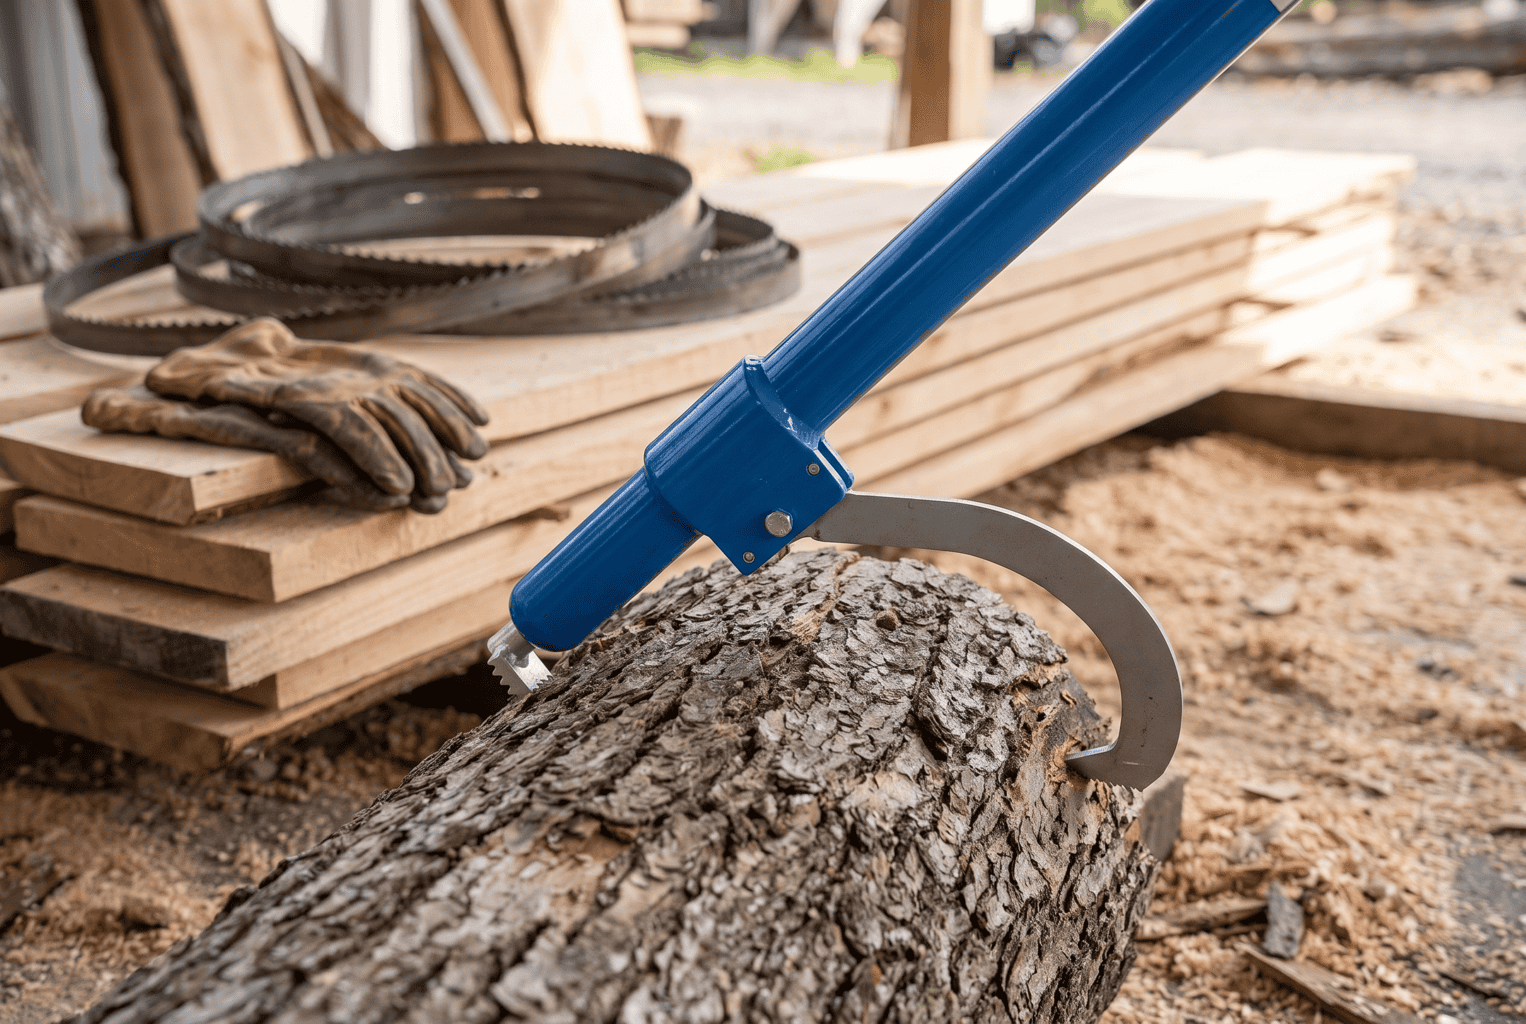
- Use a cant hook or peavey, not your back. A 48- to 60-inch handle gives you leverage and keeps your body out of the roll path; ours is a 60-inch aluminum LogRite, rated for logs from 10 to 36 inches across, and this is the same one on Amazon. Set the hook, keep your feet planted, and roll with your legs. Never wrap your fingers under a log to lift an end. That is how fingers get pinched between a log and the bed rails.
- Load with ramps, winches, or hydraulics, not muscle. On a manual mill like our LT15, we roll logs up a pair of ramps with a cant hook and, for anything heavy, a winch or the tractor. If the log starts to come back down the ramp, let it go. Do not try to catch a ton of oak.
- Keep the deck and the walking path clear. Slabs, offcuts, sawdust piles, and cant hooks left on the ground are the tripping hazards that turn a simple roll into a fall in front of a moving log. We stack slabs on a pallet and rake the deck side at every log change.
- One log at a time on the ramps. Logs staged behind the one you are loading need to be chocked. A second log rolling into the first while you are guiding it is one of the most common crush scenarios.
- Talk before you move. With two people, use a simple call-out: “clear,” “rolling,” “set.” The struck-by injuries in two-person crews almost always trace back to one person assuming the other was watching.
Loaders, skid steers, and tractors bring their own set of rules: nobody on foot within the swing radius of a load, loads carried low, and never lifted over anyone. For the mechanical side of loading and positioning on the bed, our bandsaw mill operator’s handbook walks through the full sequence from setup to final cut.
Bandsaw Mill Operating Procedure: Step by Step
This is the procedure we run on the LT15 every day. It takes about five minutes at the start and adds maybe a minute per log. It will look familiar to anyone who has read a Wood-Mizer or Woodland Mills manual, and that is on purpose. Manufacturer manuals are the primary safety document for your machine. Read yours before you take anything here as gospel.
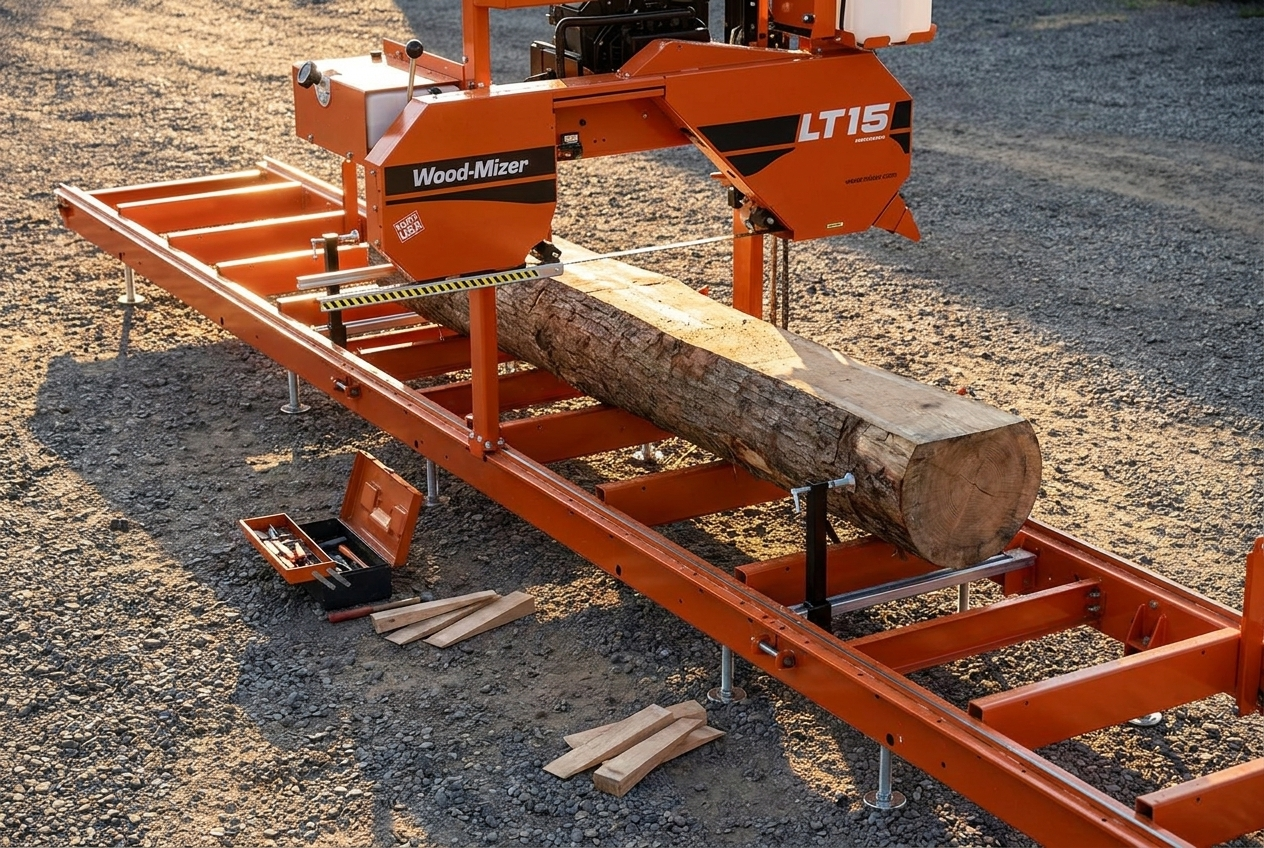
Step 1: Pre-start inspection (engine off)
| Check | What You Are Looking For | Fix Before Starting If |
|---|---|---|
| Mill level and stable | Bed sitting solid on all feet or outriggers, no rocking | Any foot is off the ground or sinking |
| Blade condition | Cracks at the gullets, missing teeth, dull or heat-blued edges | Any crack, no matter how small. Blades break at cracks, and a snapped blade at full speed is a whip. |
| Blade tension and tracking | Tension at the manufacturer’s spec; blade running in the correct position on the wheels | Blade is wandering or riding off the wheel crown |
| Guards and covers | Blade wheel covers closed and latched, blade guard in place, belt guards on | Anything open, missing, or held on with a bungee |
| Guide rollers and blade guides | Rollers spin freely, set to the right gap from the blade | Seized roller or guides touching the blade |
| Log clamps and stops | Clamp travels freely and locks; log stops raise and lower fully | Any clamp that slips under hand pressure |
| Fuel and oil | Fuel level, no leaks, engine oil in range, lube-water tank full | Any fuel smell or wet spot on the deck |
| Kill switch / emergency stop | Test it. Start the engine, hit the stop, confirm it dies. | It does not stop the engine instantly |
| Work area | Clear walking path on the operator side, slab pile and lumber stack placed, fire extinguisher within reach | Anything you would trip over while watching the blade |
Step 2: Load and secure the log
Roll the log onto the bed against the raised log stops, set the clamp, and push on the log with your hand to confirm it will not shift. A log that rolls during the cut can pinch the blade and throw the board. On the LT15 we clamp on the far side and cut toward the stops. If the log has a bad taper, level it with the toe boards before clamping, not by shimming with a scrap of 2×4 that can kick out.
Step 3: Set the cut and position yourself
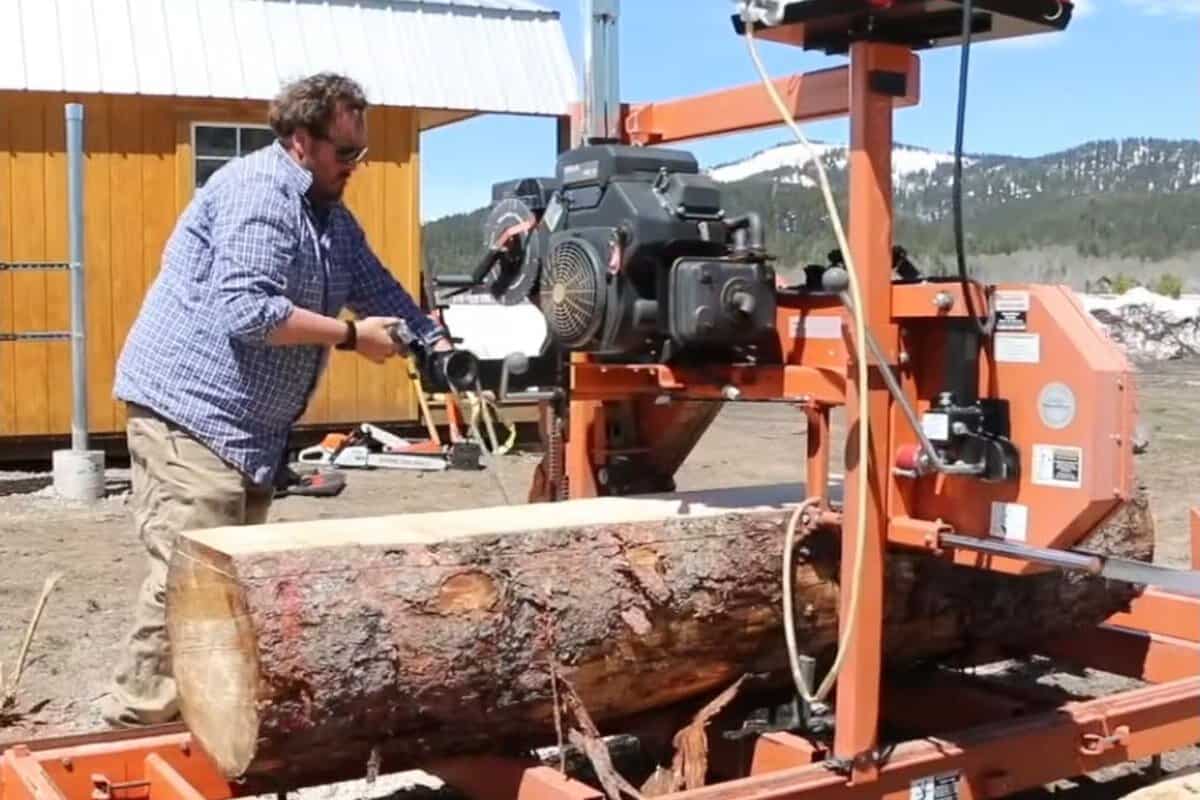
Lower the head to the cut height with the engine at idle or off. Stand on the operator side, behind the sawhead, never in line with the blade and never with any part of your body over the bed. Confirm the log stops are below the cut line. A log stop left up an inch too high will meet the blade at full speed, and that is a broken blade at best.
Step 4: Make the cut
Bring the engine up to speed, engage the blade, and feed at a steady rate. Let the blade do the work. Pushing too hard is a quality problem first (wavy cuts) and a safety problem second (blade heating, stalling, and the temptation to reach in). Keep your eyes on the blade entering and exiting the log. If the blade starts to dive or climb, stop the feed, back the head out with the blade still running, and figure out why before you continue. Our bandsaw mill troubleshooting guide covers the ten most common causes.
Step 5: Clear the board
Return the head past the end of the log before you touch anything. Disengage the blade. Then remove the board or slab from the side, keeping your hands away from the blade path. We never reach across the bed while the blade is spinning, engaged or not. A coasting blade will still open your forearm.
Step 6: Shut down before you reach in
Any time you need to clear a jam, remove a chunk of bark from the guide, change the blade, or adjust anything inside the guards: engine off, blade stopped, key out of the ignition or spark plug wire pulled, and the head lowered onto a block so it cannot drift. On a two-person crew, whoever is reaching in holds the key. That is the portable-mill version of lockout/tagout, and it is the step that gets skipped because it “only takes a second.” The sequence exists because a second is exactly how long it takes.
Blade Handling and Blade Changes
A bandsaw mill blade is a 13-foot loop of hardened steel with a tooth every three-quarters of an inch. New blades arrive coiled in three loops under tension, and uncoiling one without control sends it springing open at face height. Wear cut-resistant gloves and safety glasses, hold the coil with both hands, point the loop away from your face and anyone nearby, and let it open slowly. Coiling a used blade for sharpening takes the same care in reverse.
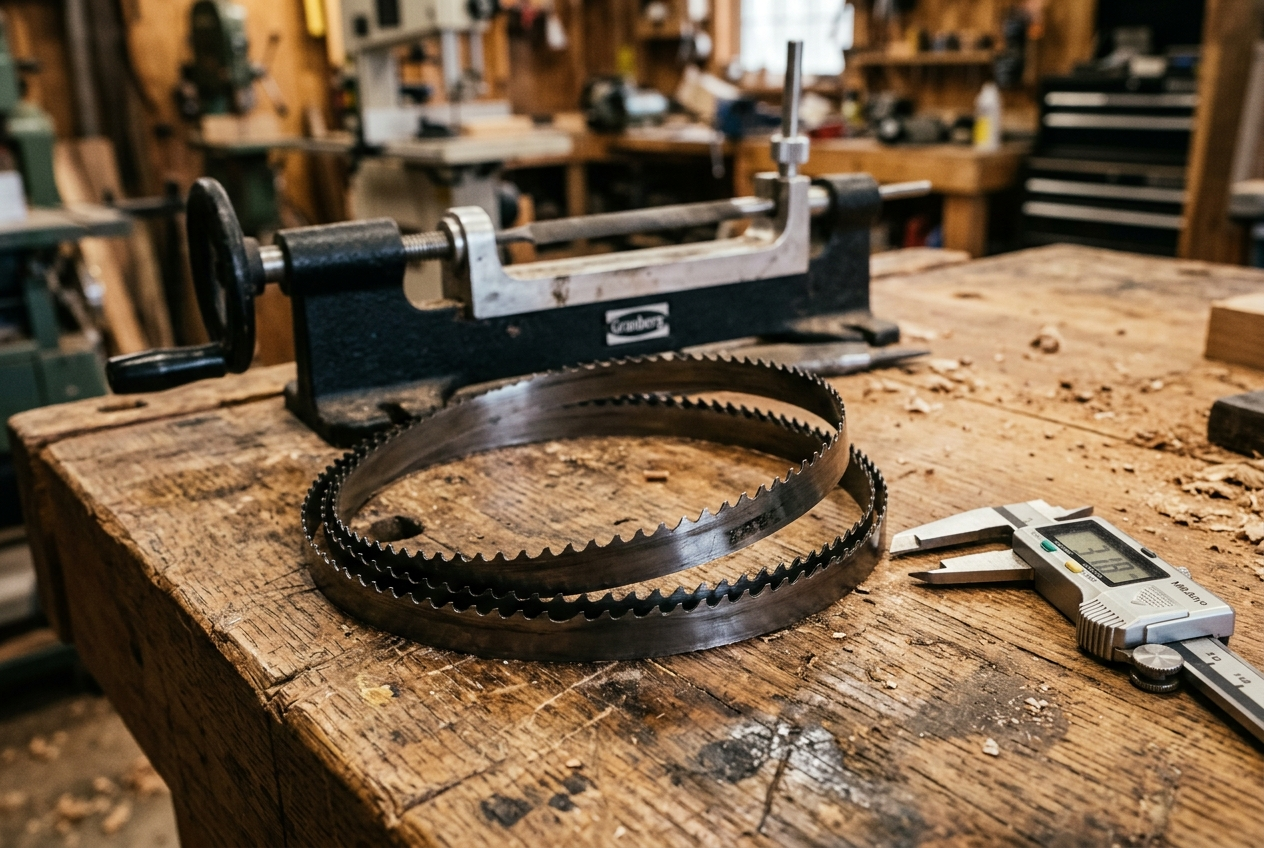
For the change itself: engine off and key out, release tension completely, open the wheel covers, lift the old blade off the wheels and out through the guides, and seat the new blade with the teeth pointing in the direction of cut (toward the operator on most mills). Re-tension to spec, spin the wheels by hand to check tracking, close and latch the covers, then start the engine and let the blade run for a few seconds with nobody in line with the wheels before you make a cut. Blade breaks happen most often on the first cut after a change, when tension or tracking is wrong. Our bandsaw mill blade guide covers tension numbers, sharpening, and when to retire a blade.
Chainsaw Safety at the Mill: Kickback, Pinch, and Chaps
Every mill site has a chainsaw running at some point, whether it is bucking logs to length, trimming a flare so the log fits the bed, or actual chainsaw milling with an Alaskan mill. The two injuries that matter are kickback and leg contact.
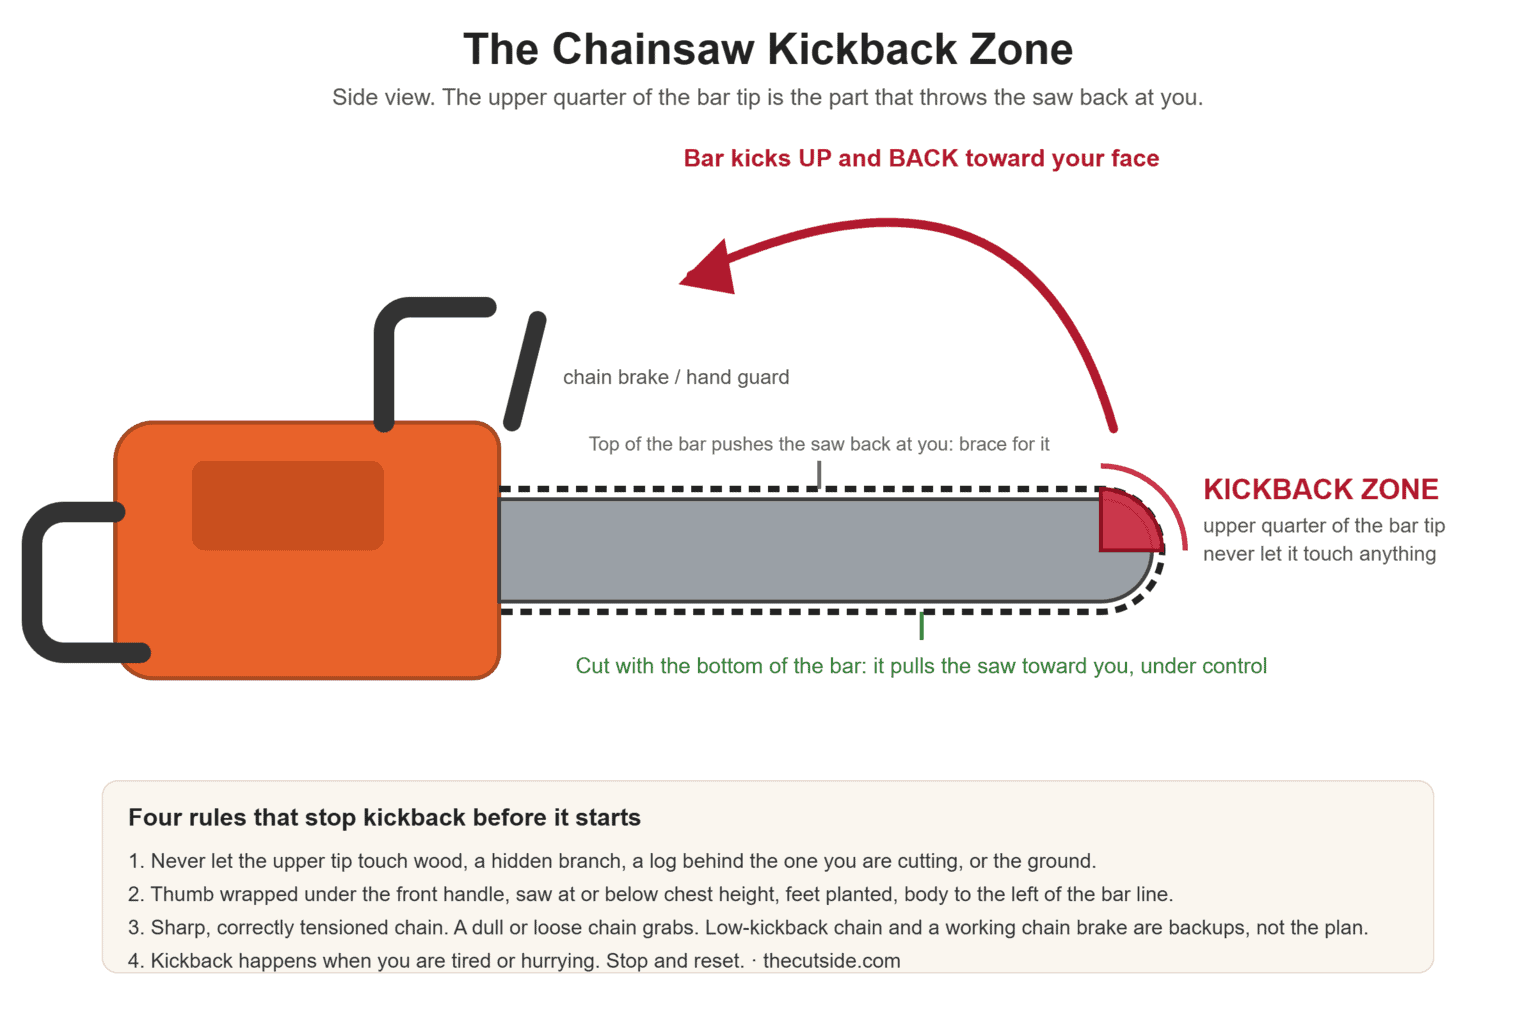
From experience: Chainsaw — you gotta watch the tip. You get in a hurry or you’re tired, and you can’t control a kickback. A chain brake or an anti-kickback chain may stop the chain, but you still have a heavy, sharp-as-hell thing headed for your face and head.
Kickback happens when the upper quadrant of the bar tip contacts wood and the chain grabs, throwing the bar up and back toward your head. It is fastest and most violent with a dull chain, a loose chain, or a tip buried in a pinch. The defenses are boring and effective: keep the tip out of contact when bucking, keep both hands on the saw with your thumb wrapped, stand to the side of the bar’s plane rather than behind it, run a sharp and properly tensioned chain, and never cut above shoulder height. On the Alaskan mill, the bar is buried in a ripping cut and the geometry is different, but pinch is the enemy. A log settling onto the bar mid-cut can stall the saw or throw it. Wedge the kerf behind the bar as you go. We covered the whole setup sequence in how to set up an Alaskan chainsaw mill for your first cut.
Leg protection is the one piece of chainsaw PPE I will argue with people about. Chaps that meet ASTM F1897 are built with layers of fiber that pull out and jam the chain sprocket on contact. They work. A wrap-style chap like the Husqvarna Technical Apron Wrap (ASTM F1897 rated, adjustable waist, calf-wrap panels that cover the back of the leg) is what I point new operators at, and this is what it looks like on Amazon. The plain apron style is lighter and about $45 cheaper, but it leaves the back of the calf open, which is exactly where a running saw finds you when you walk with it. The most common objection is that they are hot, and they are, but a chainsaw injury to the thigh is a life-threatening bleed, not a stitches-and-go-home injury. Chaps go on before the saw starts, every time, including for the “one quick cut” to trim a log end. The sustained, full-throttle cutting of chainsaw milling is harder on chaps than felling is, so inspect them for cuts and replace any pair that has stopped a chain.
Round out the chainsaw kit with a forestry helmet and mesh shield, muffs, gloves, and boots with a toe cap. A one-piece system like the Husqvarna Pro Forest helmet (ratchet-adjust ANSI Z89.1 shell, flip-up steel mesh visor, integrated hearing protectors, around $80) covers three of those in one buy — this is the same style on Amazon. If you are choosing a saw for milling, our guide to the best chainsaws for milling lumber covers the models with the chain brake and anti-vibration systems that make long cuts safer.
Dust, Fuel, and Fire
Three fire-and-health hazards that a portable operator handles differently from a stationary mill:
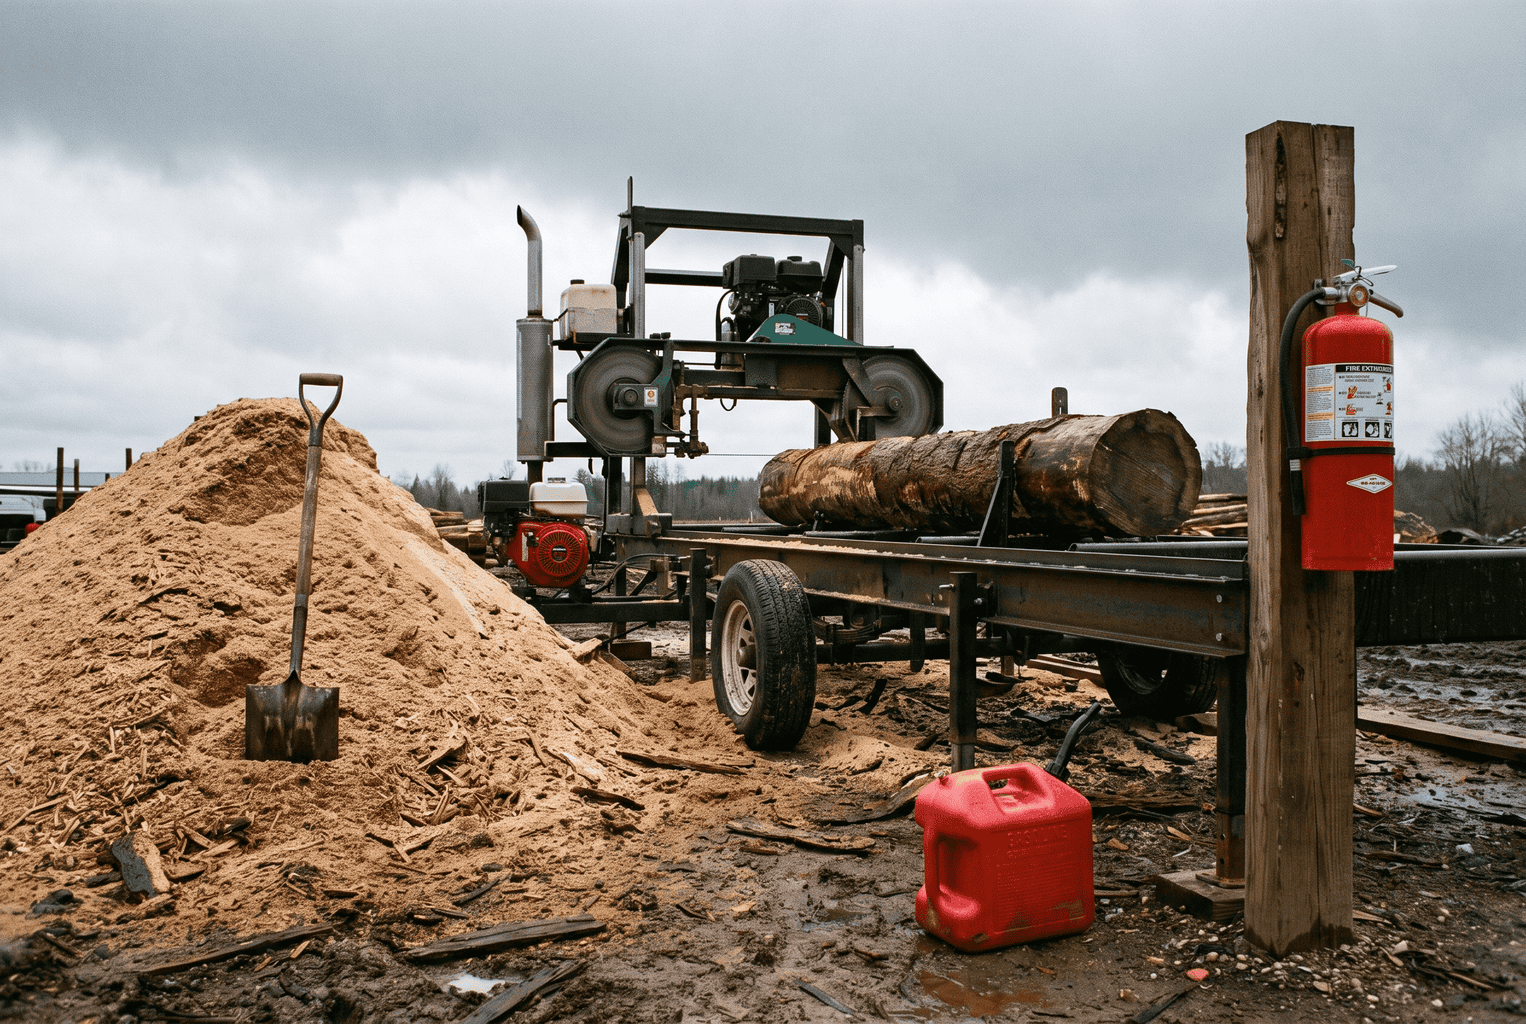
Sawdust. On an open-air site, fine wood dust is mostly a respiratory issue rather than an explosion issue. Enclosed mills and woodworking facilities fall under NFPA 664, the standard for preventing fires and explosions in wood-processing facilities, and if you have moved your mill into a pole barn you need to read it. Outside, the rule is simpler: stay upwind of the dust stream when you can, wear an N95 or better for dry hardwoods, and treat walnut, cedar, and spalted or moldy logs as respirator days. Wood dust is a recognized carcinogen for nasal and sinus cancer at chronic exposure levels, and sawyers get chronic exposure.
Fuel. Store gas in approved cans away from the mill, refuel with the engine off and cool, and wipe up spills before restarting. A hot muffler on a bandsaw mill or a chainsaw will ignite gasoline vapor and will ignite a pile of dry sawdust. We refuel the LT15 at the start of the day and at lunch, never mid-run, and never with sawdust piled against the engine.
Extinguisher. A 10-pound ABC extinguisher lives on the mill trailer, and a second one is in the truck. If you are starting from nothing, an Amerex B500 5-pound ABC comes as a two-pack that covers the trailer and the truck in one purchase; this is the pair on Amazon. Step up to a 10-pounder once you keep a slab pile. Check the gauge monthly. On dry, windy summer days we also keep a water backpack pump or a garden hose staged, because a sawdust fire under a slab pile does not go out with one extinguisher.
Working Alone, Remote Sites, and First Aid
The single riskiest thing about portable milling is that a lot of it is done alone, on somebody else’s land, out of cell range. That does not make it unsafe, but it changes the rules.
- Tell someone where you are and when you will check in. A text with the address and a “done by 4” goes to my wife every morning. If a log pins you, the difference between an hour and a night is that text.
- Check the cell signal at the mill, not at the road. If there is no signal, know where the nearest signal is, and keep the keys in your pocket, not in the truck.
- Carry a trauma kit, not a first aid kit. Band-aids do not treat sawmill injuries. Our kit has a tourniquet (learn to use it one-handed; ours is a North American Rescue C-A-T Gen 7, the same one on Amazon), hemostatic gauze, pressure bandages, trauma shears, gloves, and an eyewash bottle. NAR’s compact Individual Aid Kit is the same outfit’s gauze-and-dressing pouch and a decent base to build on; this is that kit. It sits on the mill, not in the truck 200 feet away.
- Know the site address or GPS coordinates. Rural addresses can be hard for an ambulance to find. Write it on a piece of tape on the trauma kit before you start.
- Take a Stop the Bleed or basic first aid course. Two hours, usually free through a fire department or hospital, and it is the most valuable safety training a sawyer can get.
- Do the heavy log work when a second person is around. If you must load alone, use the winch and ramps, take your time, and never put yourself between the log and anything solid.
Weather, Footing, and Fatigue
Most of the near-misses at our mill have happened in the last hour of the day or on the first icy morning of the year. Some season-specific rules:
| Condition | Hazard | What We Do |
|---|---|---|
| Cold and ice | Frozen logs shed ice chips at face level; icy ramps and bed; numb hands on controls; stiff hydraulics | Goggles instead of glasses, sand or grit on the ramps, warm up the engine at idle before loading, shorter sessions |
| Heat | Heat exhaustion during log handling; dehydration; glasses fogging and getting pushed up | Water every log, shade for breaks, start early, quit early. Fogged glasses go back on, not up on the forehead. |
| Rain and mud | Wet logs slip out of clamps and off ramps; mud under the mill feet; slick bark | Re-level the mill, add plywood pads under the feet, clamp tighter and check twice, slow the roll |
| Wind | Dust blown into the operator’s face; sparks and fire spread; loose slabs blowing | Reposition to keep the dust downwind, no refueling in gusts, extinguisher and water staged |
| End of day | Fatigue: skipped steps, rushing the last log, poor footing | We do not start a new log after a set quitting time. Fatigue is the most reliable predictor of a mistake. |
The hardest rule to follow is the last one. When a customer is watching and there is one log left, the pull to finish is strong. I have a firm rule that the last log of the day is loaded with a fresh head or it waits until morning. That rule came from the red oak that rolled off the ramps.
Does OSHA Apply to Your Sawmill?
The short version: OSHA’s sawmill standard, 29 CFR 1910.265, and the rest of the general industry standards apply to employers with employees. In practice, OSHA tends not to bother a solo owner-operator with no employees; you are generally outside federal OSHA’s reach as a one-person operation. The moment you hire a helper, even part-time or seasonal, the standards apply to your operation, and some states run their own OSHA-approved plans that are stricter than federal. Customers walking up to the mill are a different problem: that is a liability question, not an OSHA one, so know what your insurance actually covers before anyone but you is standing next to a running blade. A few of the standards that matter most for a small mill:
- 1910.265 (Sawmills): covers log handling and storage, mill machinery guarding, walkways, illumination, and kilns. Much of it was written with stationary mills in mind, but the log handling and guarding sections translate directly to a portable setup.
- 1910.95 (Occupational Noise Exposure): the 90 dBA PEL and 85 dBA action level for a hearing conservation program.
- 1910.132 through 1910.138 (PPE): requires a hazard assessment, employer-provided PPE for most items, and training in how to use it.
- 1910.147 (Control of Hazardous Energy / Lockout-Tagout): the formal version of “key out of the ignition before you reach in.”
- 1910.212 (Machine Guarding): the general requirement that blades, belts, and rotating parts be guarded.
- 1910.266 (Logging Operations): applies if your work includes felling and skidding, and it has specific chainsaw PPE requirements, including leg protection and a chain brake.
Whether or not OSHA has jurisdiction over your mill, the standards are the best free safety manual available, and following them is what a court will look at if a helper or a customer gets hurt on your site. Local rules also apply to things like noise and operating hours, which we covered in whether it is legal to run a chainsaw sawmill at night. Check with your state’s labor department or OSHA consultation program (free and confidential for small businesses) if you are hiring for the first time.
The Daily Sawmill Safety Checklist
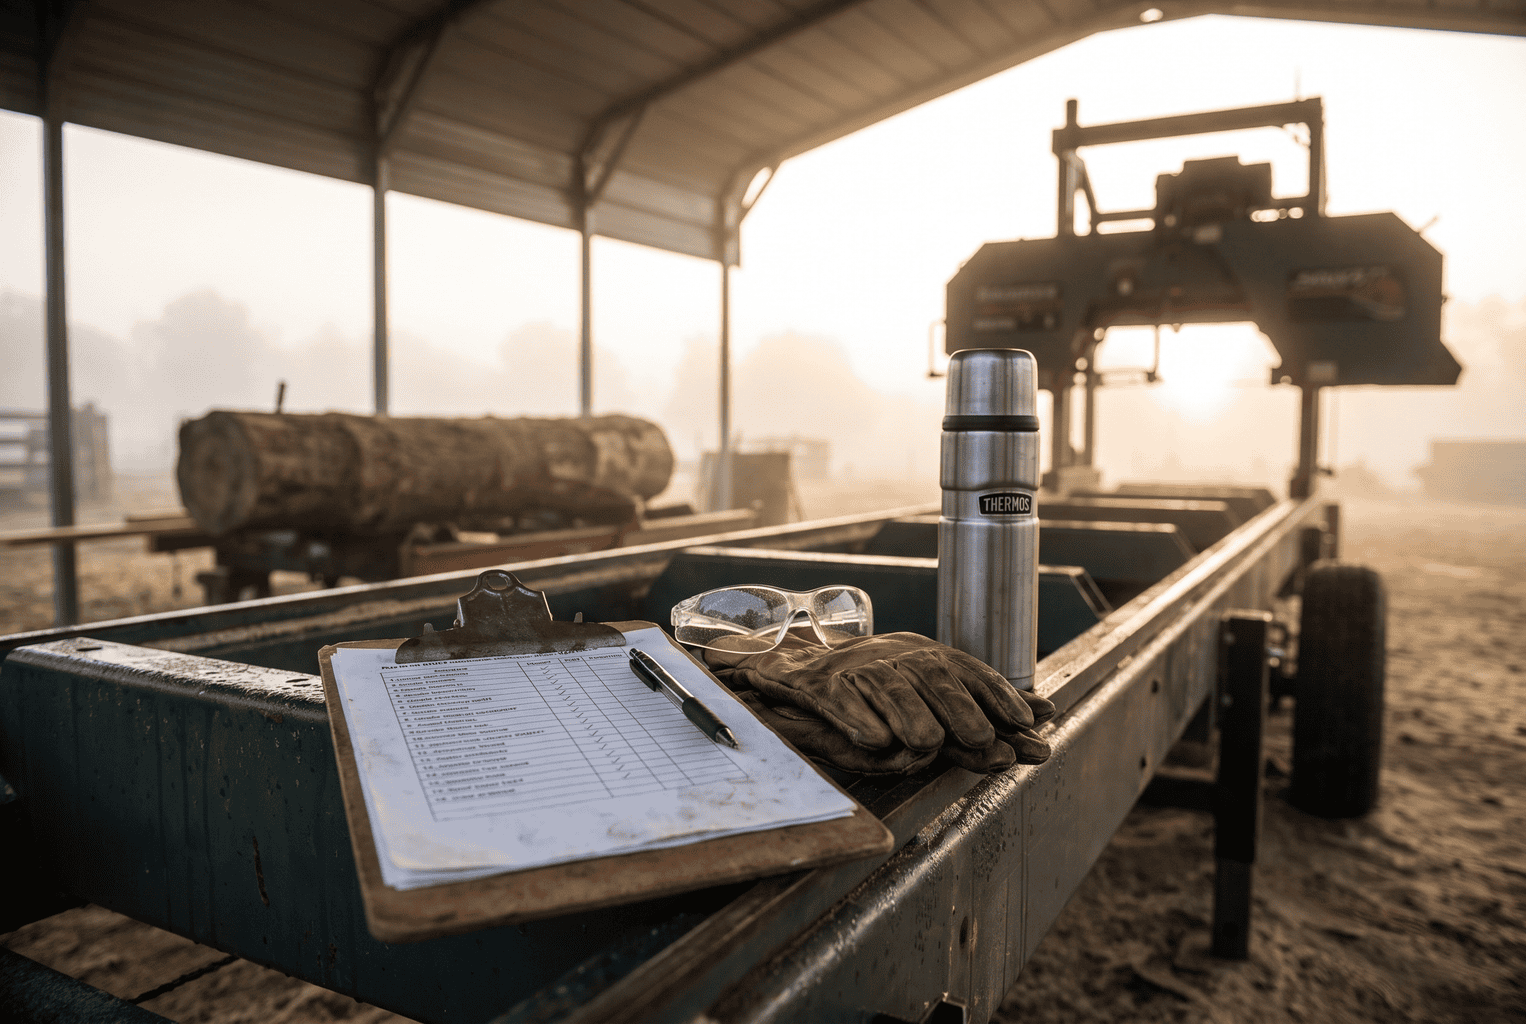
Everything above, condensed to what fits on a laminated card zip-tied to the mill:
| When | Do This |
|---|---|
| Before the engine starts | PPE on (glasses, muffs, boots, gloves, chaps if a saw is running). Mill level. Blade inspected, tensioned, tracking. Guards closed. Kill switch tested. Fuel and lube checked, no leaks. Extinguisher and trauma kit on the mill. Walking path clear. Check-in text sent. |
| Every log | Logs behind the one you are loading are chocked. Nobody downhill of the log. Cant hook, not hands. Log against stops, clamped, pushed to confirm. Log stops below the cut line. Deck raked, slabs stacked. |
| Every cut | Stand behind the head on the operator side. Eyes on the blade in and out of the log. Steady feed. Head returned past the log before touching a board. Never reach across the bed with the blade moving. |
| Any time you reach in | Engine off. Blade stopped. Key out or plug wire pulled. Head blocked. Then and only then. |
| Blade change | Gloves and glasses. Tension released. Teeth pointing the right way. Tension to spec, hand-spin to check tracking. Covers latched. Nobody in line with the wheels on first start. |
| Refueling | Engine off and cool. Sawdust cleared from around the engine. Spills wiped before restart. |
| End of day | No new log after quitting time. Mill shut down, key pulled, head lowered. Extinguisher gauge checked. Near-misses noted so they get fixed instead of repeated. |
Frequently Asked Questions
What PPE do you need to run a sawmill?
At minimum: ANSI Z87.1 safety glasses, hearing protection (NRR 25 or higher), ASTM F2413 steel- or composite-toe boots, snug work gloves, and fitted clothing with nothing loose. Add ASTM F1897 chainsaw chaps, a helmet with a face shield, and double hearing protection whenever a chainsaw is running, and an N95 or better respirator for dusty species or enclosed milling.
Is running a sawmill dangerous?
Yes. OSHA lists sawmill work among the most dangerous occupations in the United States, with lacerations, amputations, crush injuries, and hearing loss as the common outcomes. The risk is manageable with a consistent routine. Most serious injuries trace back to log handling and to reaching into the blade path with the machine running, and both are preventable with the procedures in this guide.
What is the most common sawmill injury?
Log handling injuries, meaning crush and struck-by incidents during unloading, rolling, and loading, are the largest category of serious sawmill injuries, followed by blade contact. Noise-induced hearing loss is probably the most common injury overall, but it develops slowly enough that operators rarely count it until it is permanent.
Do OSHA sawmill regulations apply to a hobby or one-person mill?
Usually not in practice: federal OSHA (29 CFR 1910.265) covers employers with employees, so a solo owner-operator with no hired help is generally left alone. That changes the day you bring on a helper, and some state OSHA plans run stricter than federal. Customers walking up to the mill are a separate issue, a liability question rather than an OSHA one, so check what your insurance actually covers before anyone but you is on the site.
How do you safely change a bandsaw mill blade?
Shut the engine off and pull the key, release blade tension fully, open the wheel covers, and remove the blade wearing cut-resistant gloves and safety glasses. Seat the new blade with the teeth pointing in the direction of cut, tension to the manufacturer’s spec, spin the wheels by hand to confirm tracking, latch the covers, and make sure nobody is in line with the wheels when you start the engine for the first cut.
The Bottom Line
Sawmill safety is not a list you memorize. It is a routine you run the same way on the hundredth day as the first, especially when you are tired and the customer is watching. Wear the PPE every time. Handle logs with tools and gravity on your side. Shut the mill down before you reach in. Run the five-minute inspection every morning. Those four habits cover the vast majority of the ways sawyers get hurt, and none of them cost more than a set of chaps and a pair of good glasses.
If you are new to milling, start with our complete guide to portable sawmills to understand the equipment, then come back to this page and build the routine before your first log goes on the bed. If you have been at it for years, pick the one rule on the daily checklist you have been skipping and put it back. The blade does not know how long you have been doing this.
Written by Jason Lewis, ten-plus years running a Wood-Mizer LT15 on upper-Midwest hardwoods; this is the PPE and pre-start routine used at his mill, checked against OSHA 1910.265.