
The first stack of lumber I ever ruined was red oak. We had just gotten the Wood-Mizer LT15 set up at the edge of our woodlot in the upper Midwest, sawed a beautiful log into 4/4 boards on a Saturday, and left them dead-stacked on the ground under a blue tarp because it was going to rain. By the time I came back a week later the bottom courses were gray with stain, the top boards had cupped like potato chips, and every board had a split running four inches in from each end. That’s when I learned that milling is only half the job. Knowing how to dry lumber from a sawmill is what turns a pile of wet boards into something you can sell or build with.
Quick Answer: To dry lumber from a portable sawmill, stack the boards on level bunks 12–18 inches off the ground the same day you saw them, separate every course with dry 3/4-inch stickers spaced 12–24 inches apart and lined up vertically, seal the board ends, put a roof and weight on the stack, and let it air-dry to 12–16% moisture content. Plan on roughly 1 year per inch of thickness for hardwoods (often less), then finish the last stretch to 6–8% in a kiln or a heated space if the wood is going indoors.
I’m Jason Lewis. I’ve run a portable mill for more than ten years, most of that on the LT15 cutting oak, maple, ash, cherry, and walnut off small woodlots. This guide is the whole drying process the way we actually do it, from the moment the board leaves the blade to the moment a moisture meter tells you it’s ready. It’s the hub for our lumber-drying cluster, and it links out to the deeper how-tos as they go live. If you’re still deciding on a mill, start with our complete guide to portable sawmills and come back here once you’ve got green boards to deal with.
Drying lumber is the controlled removal of water from freshly sawn boards, by air or in a kiln, until the wood reaches a moisture content that matches where it will be used — green hardwood off a portable sawmill starts anywhere from 60% to well over 100% moisture content and has to come down to 12–16% for outdoor and shop use, or 6–8% for furniture that lives in a heated house.
Last Updated: September 2026 | Jason Lewis has spent ten-plus years running a Wood-Mizer LT15 on upper-Midwest hardwoods — every stacking, sealing and drying-time number in this guide comes off lumber that dried in his own yard, not off a spec sheet.
Why You Can’t Skip Drying (Even If You’re Building a Shed)
A board that comes off the mill is usually somewhere between 40% and 100% moisture content depending on species and time of year. Sapwood in a spring-cut soft maple can be well over 100% (yes, more water than wood by weight). Nothing structural changes until the wood drops below about 30% moisture content, the fiber saturation point. Below that line the cell walls themselves start losing water, and the board begins to shrink. Most of our upper-Midwest hardwoods shrink between 6% and 8% across the width of a flat-sawn board on the trip from green to oven-dry, according to Penn State Extension. A 12-inch-wide green oak board can lose close to three-quarters of an inch of width.
If that shrinkage happens after you’ve built with the wood, you get the classic problems: cupped tabletops, gaps in T&G flooring, drawers that bind, glue joints that let go, and siding that pulls its nails. Even rough framing in an outbuilding will twist and check if you nail it up soaking wet. Drying gets the shrinkage over with before the wood becomes a product.
The number that governs everything is equilibrium moisture content (EMC): the moisture level wood settles at for a given temperature and humidity. Air at 80°F and 75% relative humidity gives an EMC of about 14.3%. A heated house in winter at 70°F and 20% humidity has an EMC around 4.4%. The average outdoor EMC across most of the northern U.S. sits in the 12–14% range. That is why air-dried lumber alone is never dry enough for furniture that lives in a house: the wood will keep shrinking after you build with it. A swing of about 2% moisture content is tolerable; more than that and problems show up.
Air Drying vs. Kiln Drying: Which Is Right for a Small Operation?
Every sawyer I know does at least some air drying, because it’s free and it does the heavy lifting. The only real question is whether you add a kiln at the end. Here’s how the three options compare for a one- or two-person mill.
| Method | Upfront cost | Time to dry 4/4 hardwood | Lowest moisture you’ll reach | Best for |
|---|---|---|---|---|
| Air drying (stickered stack outdoors) | Nearly free (bunks, stickers, roofing) | 3–12 months to 20%; 12–15% takes longer | 12–16% (climate-dependent) | Framing, sheds, siding, fence boards, pre-drying before a kiln |
| Solar kiln (DIY, Virginia Tech style) | Roughly $2,000–$5,000 in materials for ~1,000 BF capacity | 4–10 weeks from green in summer | 6–8% in good sun | Hobby and side-business sawyers who sell furniture-grade lumber |
| Dehumidification (DH) kiln | Several thousand dollars for the unit plus an insulated chamber; DIY versions cheaper | 2–6 weeks from air-dried; longer from green | 6–8% year-round, plus sterilization | Operators selling kiln-dried stock to woodworkers or contractors |
Our rule at the mill: everything gets air-dried first, and only wood that’s going indoors or to a paying customer goes through the kiln. Air drying a load down to 15–20% before it ever sees the kiln cuts kiln time and energy cost dramatically and reduces defects, because the fastest, riskiest part of drying (the drop from green to 30%) happens slowly and gently outside. That’s the same sequence commercial hardwood yards use, just smaller.
Step 1: Get Boards Off the Mill and Onto Stickers the Same Day
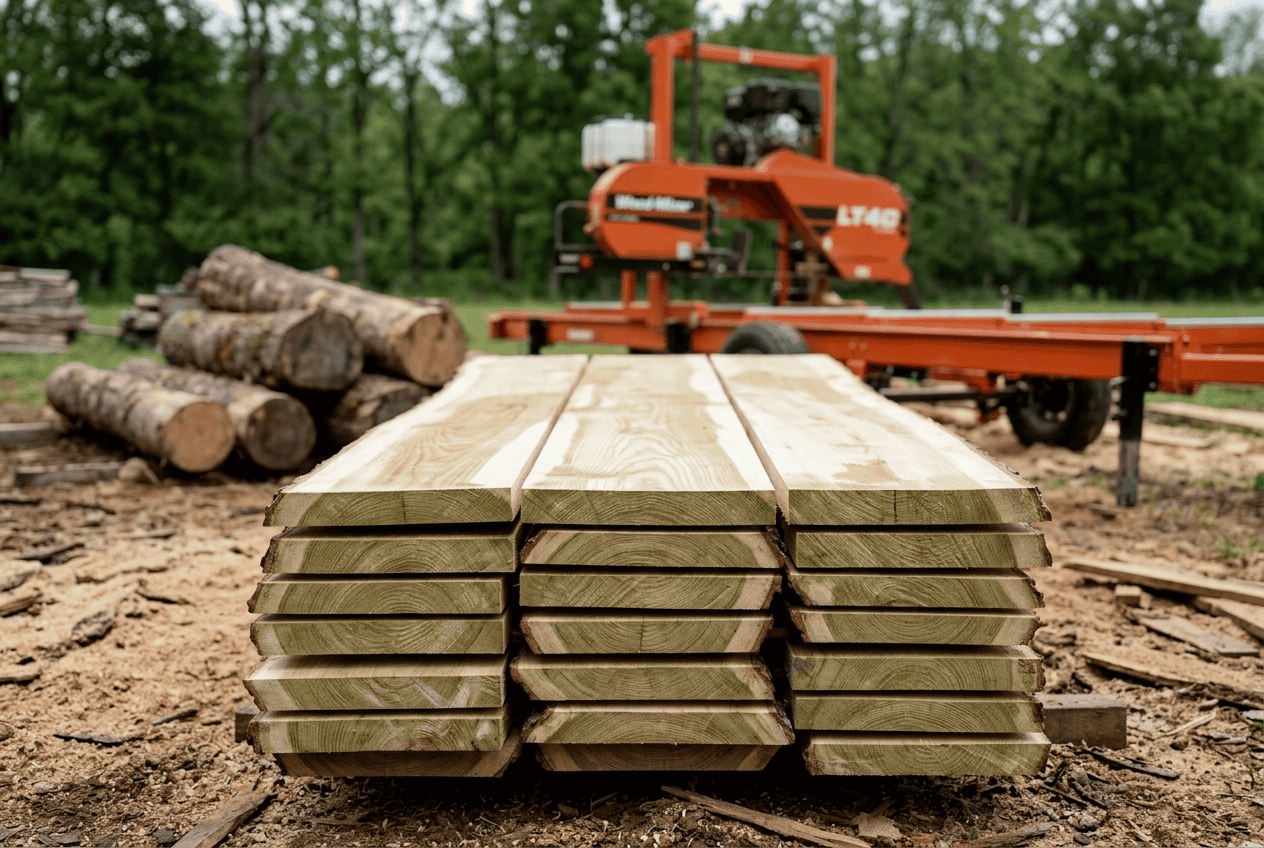
The single biggest mistake new sawyers make is the one I made with that oak: sawing all day and stacking “later.” In warm weather, sticker stain and mold can start on dead-stacked boards within 24–48 hours, and on whitewoods like maple, basswood, and ash the gray-blue staining will show through the finished surface. Have your bunks built and your stickers cut and dry before you start the mill. On sawing days we pull boards straight from the outfeed to the stack.
Sort as you go. Keep species separate, keep thicknesses separate, and put the same lengths together in a stack. A stack of mixed 8-foot and 12-foot boards leaves overhanging ends unsupported, and those ends will bow. If you have to mix lengths, put the long boards on the bottom and stagger the short ones so the ends land over a sticker. Our board foot calculator helps you plan how much stack you’re going to need before the log is even on the mill.
Step 2: Build a Foundation That Won’t Move
A lumber stack is only as flat as what it sits on. Cupped, twisted lumber is very often a foundation problem, not a drying problem. What we use:
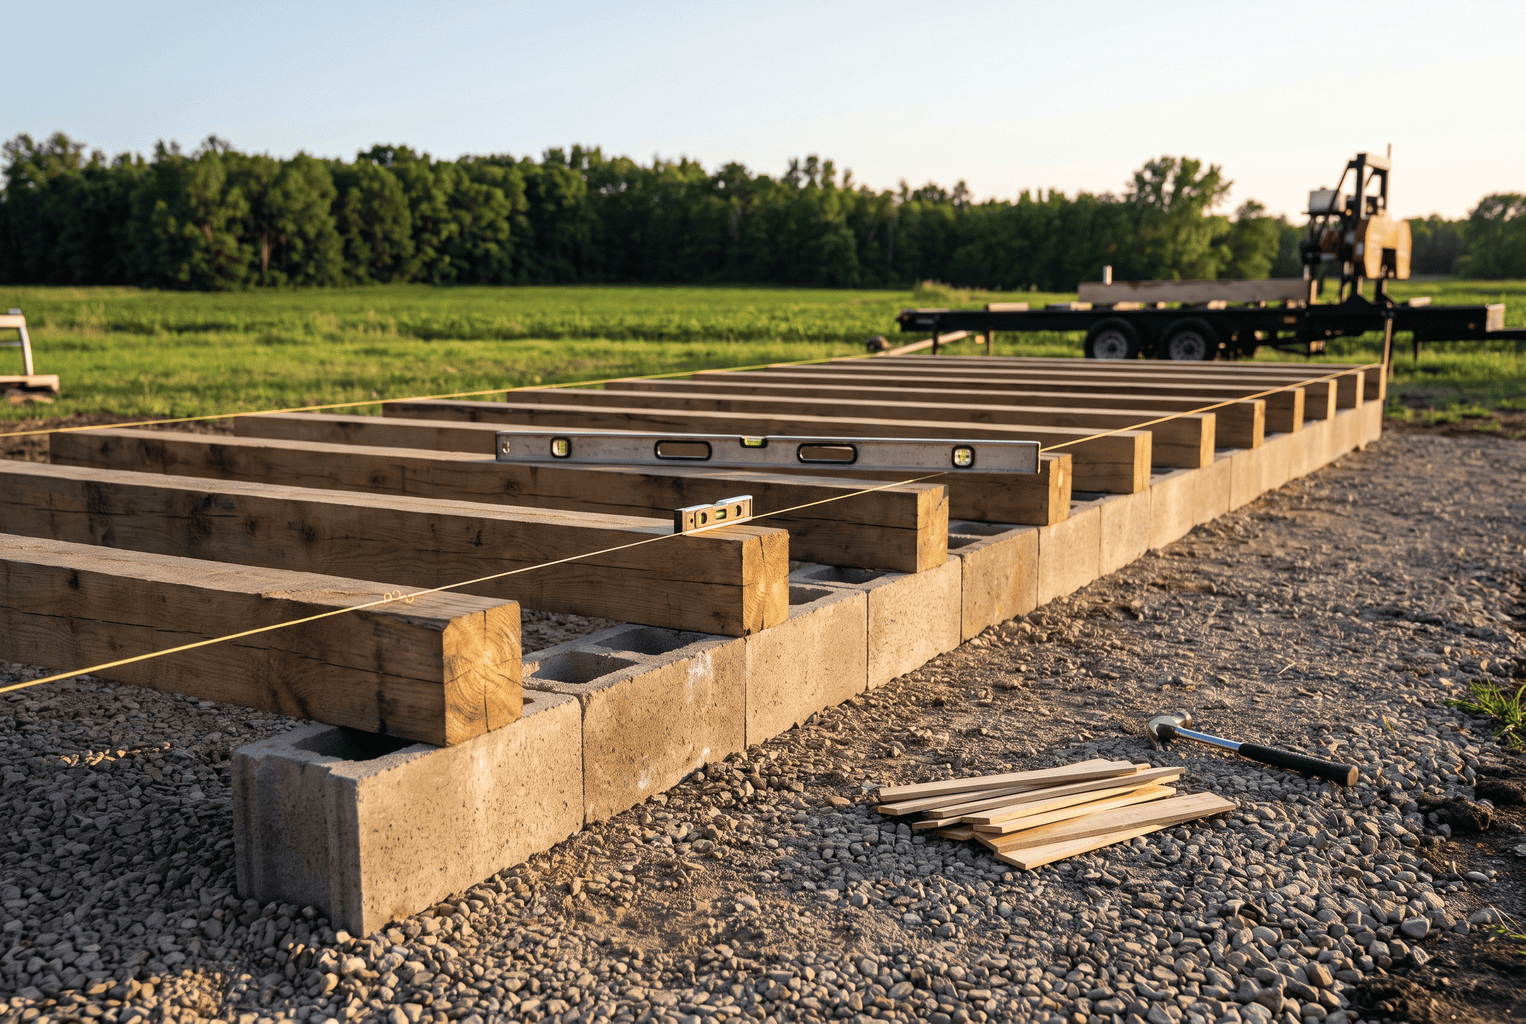
- Location: Open ground with a breeze, out of low spots where fog and dew collect, and away from the north side of buildings. Not under trees; leaf litter, sap, and shade are all bad. Orient the stack so the prevailing wind hits the side (across the stickers), not the ends.
- Bunks: Pressure-treated 4x4s or 4x6s on concrete blocks, spaced on the same centers as your stickers (we use 16 inches). Bottom course of lumber should sit at least 12 inches off the ground; 18 is better. Ground moisture rising into the bottom boards is where most rot and stain starts.
- Level: Run a string line and a 4-foot level across every bunk (a 48-inch aluminum box level like this one on Amazon spans two bunks at 16-inch spacing, which is the whole point of the longer level; a torpedo level only tells you about one bunk). A quarter-inch sag in one bunk becomes a bow in every board above it. Shim with treated wedges or flat stones, not scraps of green lumber that will shrink.
- Ground cover: Gravel or landscape fabric under the stack keeps weeds down and cuts humidity coming up from bare soil.
A cheap trick we picked up from a neighbor with a Norwood: build one permanent, dead-level bunk set out of treated timber and use it forever. Every new stack goes on the same footprint. It’s easier to level once than twenty times.
Step 3: Sticker and Stack the Right Way
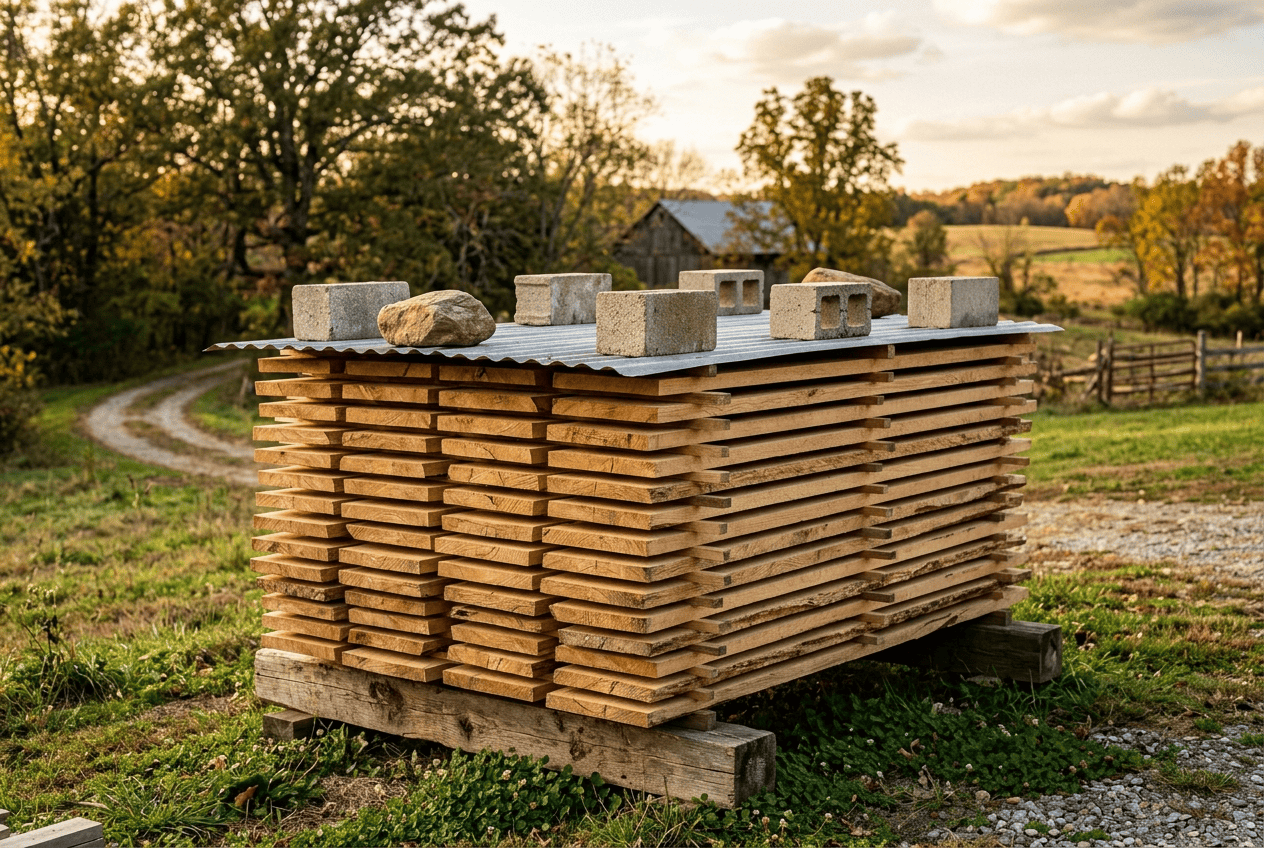
Stickers are the thin strips that separate each layer (course) of boards so air can move across both faces. Get them right and the rest of drying mostly takes care of itself.
From experience: Most guys seem to sticker around 16–24 inches apart and keep the stack at least 6–12 inches off the ground so air can actually get under it. I do the same, but adjust a smidge where there are knots, because I figure that’s where it will tend to warp. The expensive screwups were usually bad airflow or damp stickers — ended up with stain, mold, even warped boards from drying unevenly.
| Sticker spec | What we use | Why it matters |
|---|---|---|
| Thickness | 3/4 inch (1 inch for thick slabs) | Thinner starves airflow; thicker wastes stack height. All stickers must be the same thickness or boards will bend around the tall ones. |
| Width | 1 to 1-1/4 inches (2–3 inches at the board ends) | Narrow stickers minimize sticker shadow. Wider end stickers slow drying at the ends and cut end checks. |
| Spacing | 16 inches on center (never more than 24) | 12–16 inches for oak and other check-prone species and for anything you’ll sell as furniture stock. |
| End placement | Flush with or within 2 inches of the board ends | Unsupported ends droop and split. This is the most common sticker mistake. |
| Alignment | Every sticker directly above the one below, directly above a bunk | Weight has to travel straight down through the stack. Offset stickers put a bend in every course. |
| Moisture | Dry (under 20%), ideally kiln-dried | Green stickers stain the boards and rot in the stack. |
| Species | Dry pine, poplar, or the same species as the stack | Avoid oak stickers on white woods; tannins leave dark marks. Avoid anything with pitch. |
We cut our own stickers on the LT15 out of the poplar and soft maple that isn’t worth much as lumber, then dry them for a season before using them. Clemson Extension has a good writeup on cutting a full log into stickers on a portable mill; a single 12-inch by 8-foot log will give you a few hundred. Cut them 3/4 by 1-1/4 and you’ll sticker roughly 1,000 board feet of 8-foot lumber with 200 of them.
Stacking rules that go with the stickers: lay boards edge to edge with a finger’s width of gap between them, keep the outside edges of the stack plumb, and keep the courses full-width. If a course comes up short, fill it with a scrap board rather than leaving a gap under a sticker. Put your best boards in the middle of the stack where drying is slowest and most even, and your junk boards on top and bottom as sacrificial layers. Stack height is limited by what you can lift safely; we run about 4 feet of lumber on 18-inch bunks and stop.
Step 4: Seal the Ends
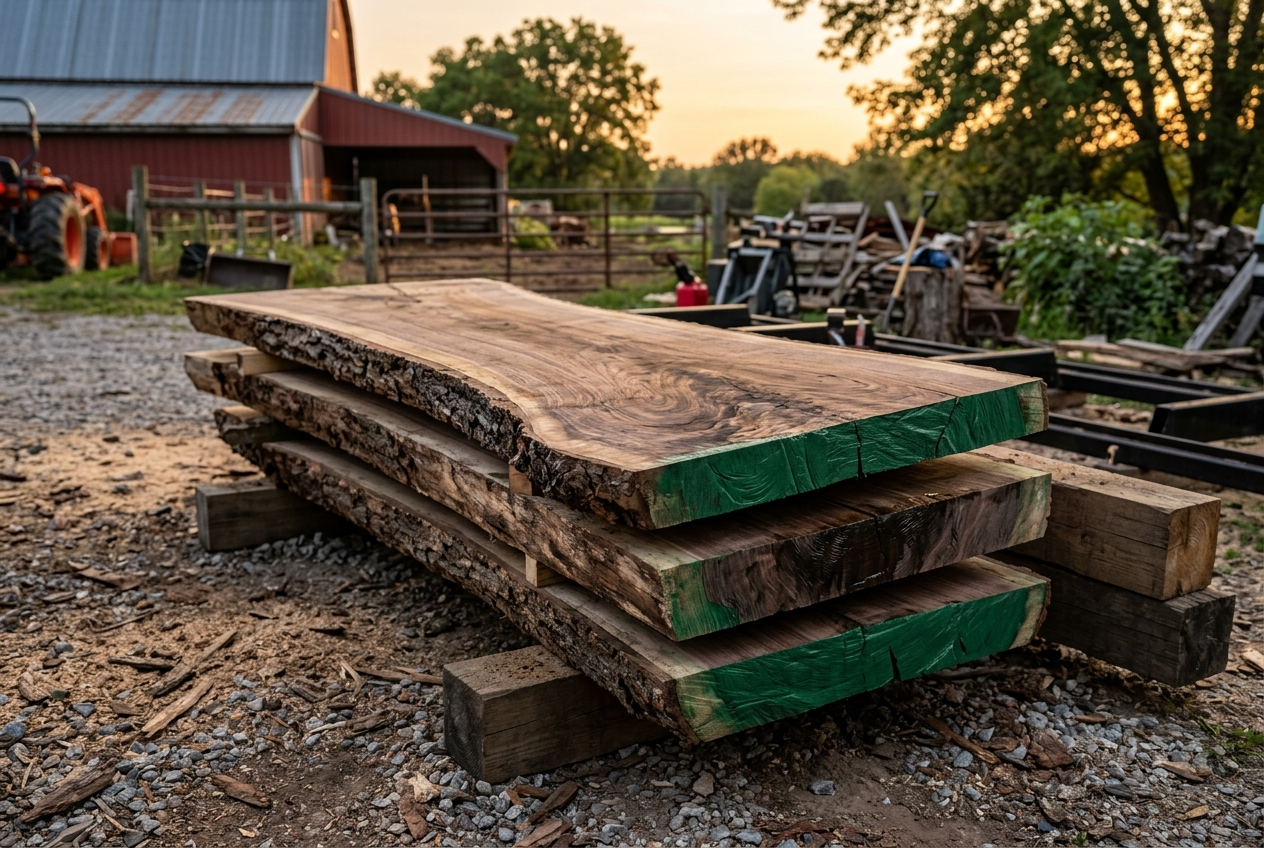
Wood gives up water through end grain roughly 10 to 12 times faster than through the face. The ends of a board race ahead of the middle, shrink first, and tear themselves apart; that’s end checking. On an 8-foot oak board, unchecked end splits can cost you 6–12 inches on each end, which adds up to 10% or more of the lumber’s value on the ground. Sealing the ends is the highest-return five minutes in the whole drying process.
What works, best to worst: a wax emulsion end sealer (Anchorseal 2 is the one everybody knows — a water-based wax emulsion that brushes on like thick paint, dries clear-to-milky, and covers somewhere around 200 square feet of end grain per gallon; this is the gallon size on Amazon, which is the one to get if you are sealing more than a log or two, because the quart is gone after one good-sized walnut. House-brand versions are the same idea), two heavy coats of exterior latex paint, or, in a pinch, old oil-based paint or even paraffin wax melted and brushed on. Seal the ends of the log as soon as it’s bucked if it’s going to sit for more than a week or two, and re-seal the fresh ends of the boards right after sawing. On valuable stuff like walnut and cherry we seal the ends on the mill deck before the board ever comes off. For live-edge slabs we also seal 6 inches or so of face on each end, since the wide faces of a slab crack from the ends as well; there’s more on that in our guide to milling live edge slabs.
Step 5: Cover and Weight the Stack
The top of the stack needs a roof, not a blanket. A tarp laid directly on the lumber traps moisture, blocks airflow, and turns the top courses into a mold farm. Use sheet metal roofing, plastic roofing panels, old plywood, or slab offcuts, with 6–12 inches of overhang on every side and an air gap between the cover and the top course (lay a set of stickers or 2x4s on top of the stack, then the roof). Pitch it a little so rain runs off away from the side that gets the wind.
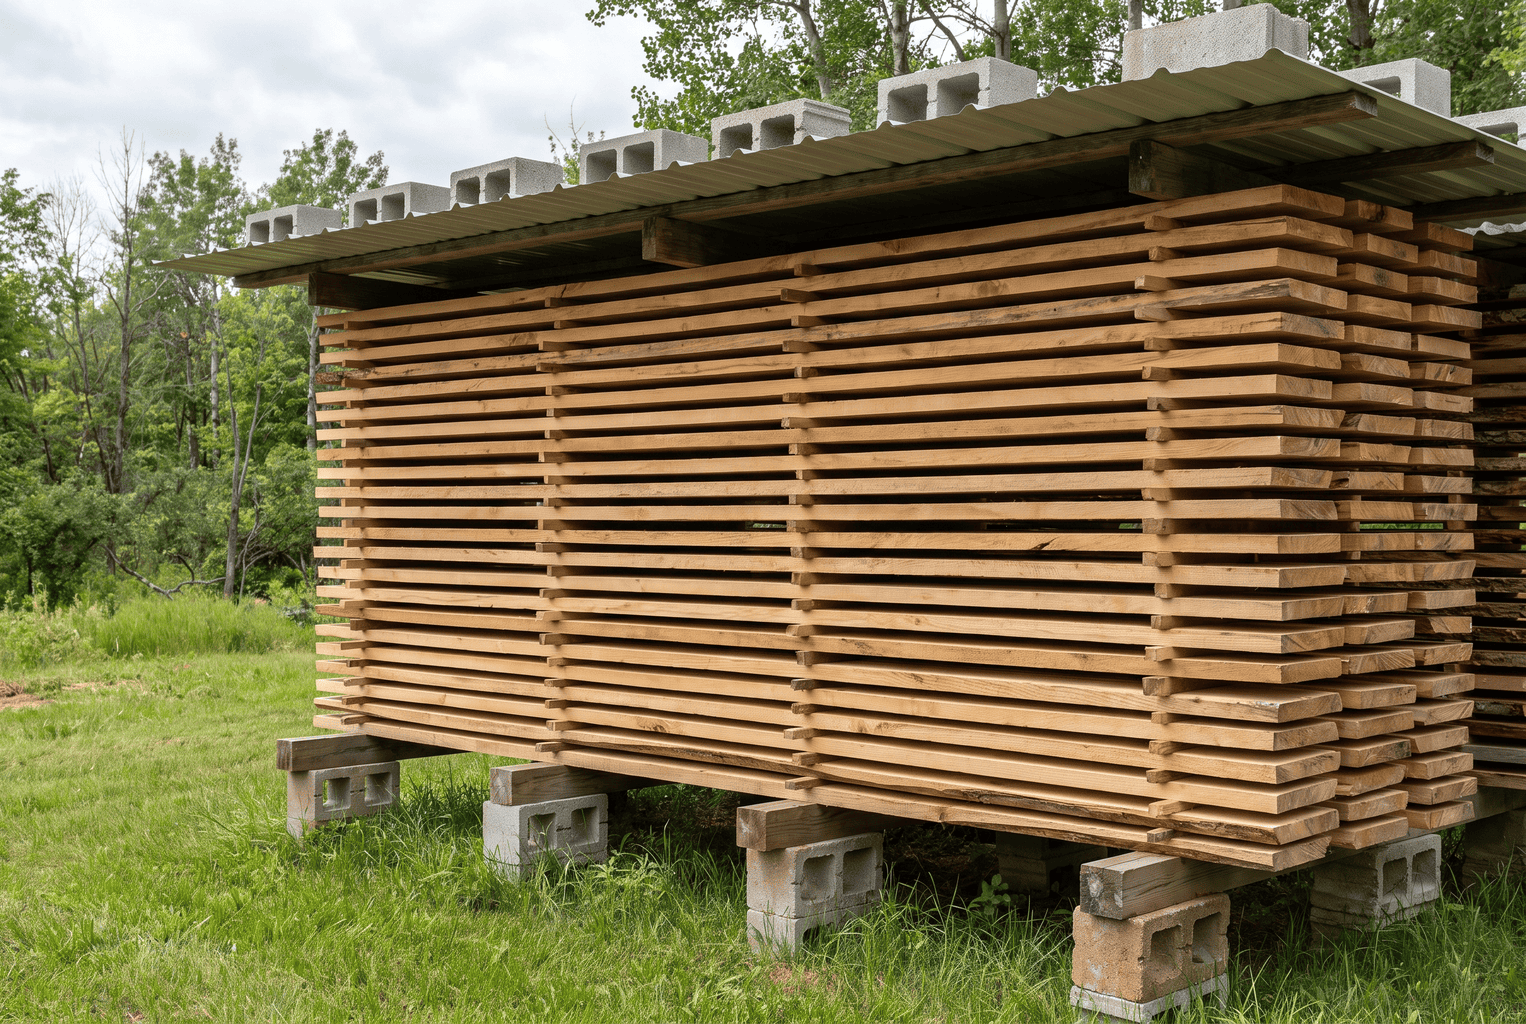
Then weight it. As the top courses dry they want to cup, and the only thing that stops them is downward pressure. We put concrete blocks on top of the roofing, one over every sticker line, which works out to roughly 150–250 pounds per 4×8 stack. Commercial yards use ratchet straps or dedicated weights; some Woodland Mills owners strap every stack with two or three ratchet straps and re-tighten them monthly as the stack shrinks. Straps work, but they need re-tensioning every few weeks or they go slack and do nothing. If you go that route, a 2-inch by 27-foot strap rated around 3,300 pounds working load is the size that actually reaches around a 4-foot-wide stack with room to ratchet — an item like this on Amazon; the short 8- and 10-foot tie-downs sold for truck beds will not make it around. Blocks don’t need babysitting.
For the sides: in a dry, windy site a solid stack on its own is fine. In an exposed site with hot afternoon sun on the west face, boards on that side will surface-check. A sheet of plywood or a shade cloth leaned against the sun side, or simply putting the stack in the partial lee of a building, slows that side down. The goal is even airflow, not maximum airflow.
Step 6: Match Airflow and Timing to the Species
This is the part most guides skip and the part that separates a sawyer who sells clean, bright lumber from one who sells gray boards at a discount. Different species want different treatment.
- Whitewoods (maple, ash, basswood, birch, poplar): These stain fast in warm, humid weather. Saw and stack them in late fall, winter, or early spring when it’s cold and dry, get them on stickers within hours, and give them all the airflow you can. Hard maple sawn in July is a gamble; the same log sawn in November comes out white.
- Oak (red and white): The opposite problem. Oak dries slowly, and if you push it (full sun, full wind, thin boards) it surface-checks and honeycombs. Site oak stacks where they get steady but moderate airflow, use tighter sticker spacing, and don’t panic if 4/4 red oak takes a full year to reach 15%. White oak is slower still.
- Walnut and cherry: Relatively forgiving, moderate speed, but valuable enough that you should seal ends immediately and keep the best boards in the middle of the stack. Walnut sapwood will stain if stacked wet in summer.
- Pine, spruce, cedar, and other softwoods: Fast. In a good summer a 4/4 pine stack will hit 15–20% in 6–10 weeks. Pine stacked green in summer can blue-stain within days, so the same-day rule applies. Cedar barely cares what you do to it.
Season matters as much as species. A stack started in April in our climate gets a full drying season and is usually below 20% by fall. A stack started in October mostly sits there until March; wood dries very little when it’s below freezing, though it also doesn’t stain, which is why winter is a fine time to saw and stack whitewoods.
How Long Does Lumber Take to Air Dry?
The old rule is one year per inch of thickness. It’s a useful conservative planning number, and it’s also wrong in both directions: 4/4 pine can be ready in a couple of months, and 12/4 white oak can take three years. The U.S. Forest Products Laboratory publishes the numbers we actually plan around: approximate days for green 1-inch lumber to reach 20% moisture content, air-dried under decent conditions. The ranges are wide because they cover season and climate; the short end is a spring start in a warm state, the long end is a fall start in the north.
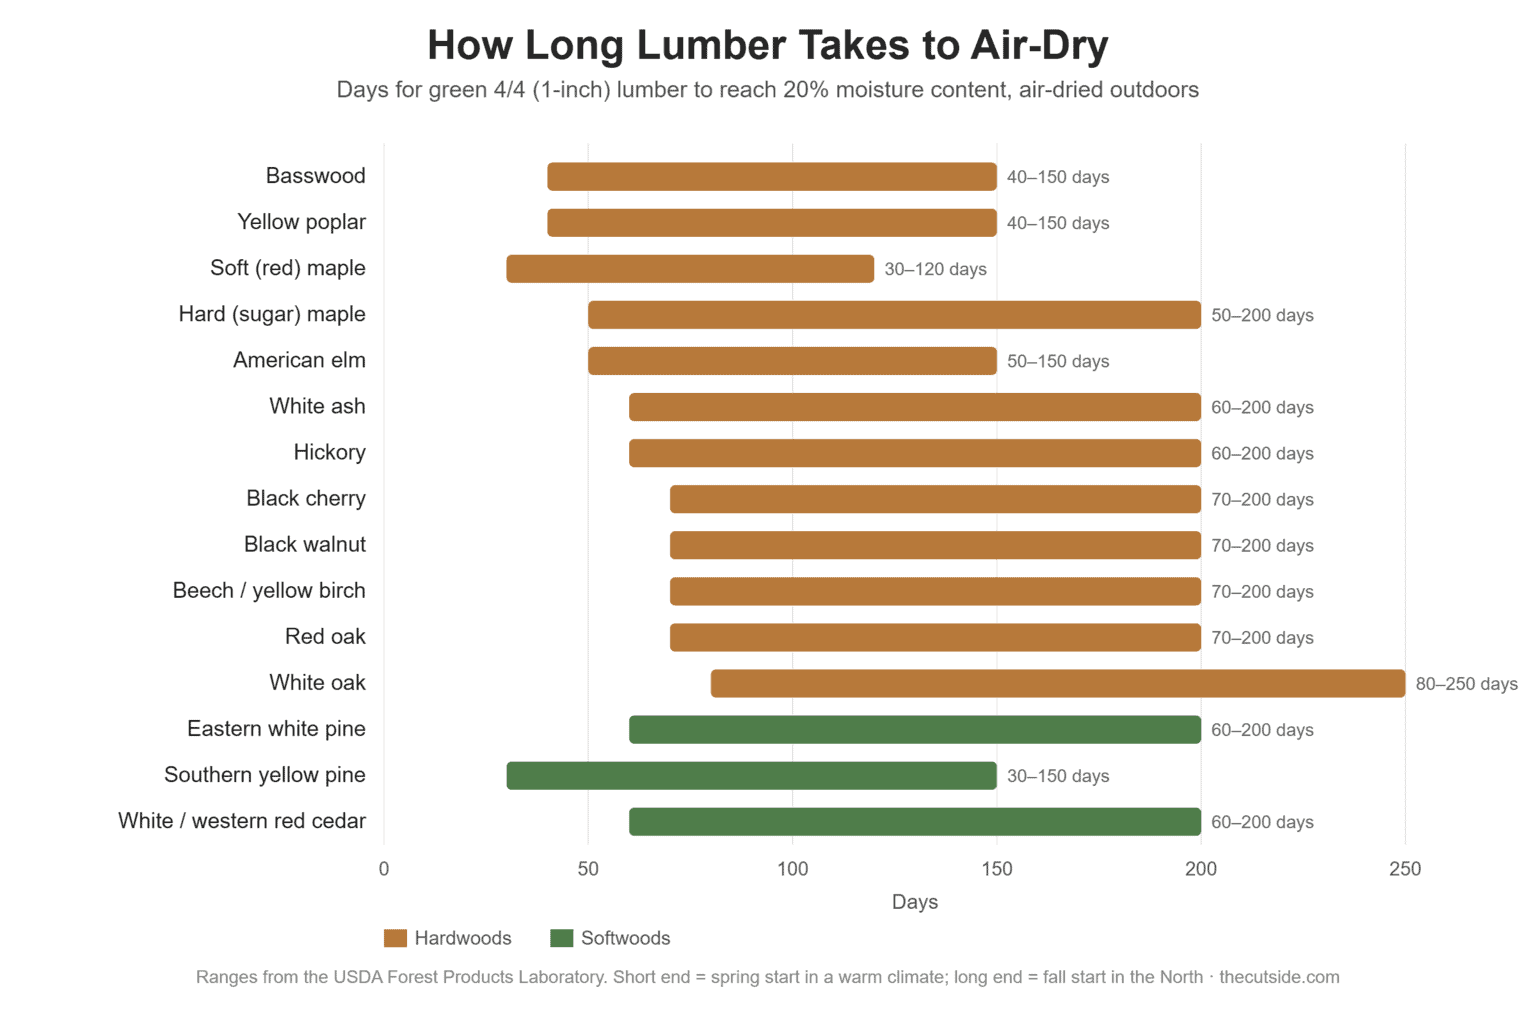
| Species | Approx. days to air-dry 4/4 to 20% MC (FPL) | Our real-world note (upper Midwest) |
|---|---|---|
| Basswood | 40–150 | Fast; stack in cold weather or it stains gray |
| Yellow poplar | 40–150 | Easiest hardwood to dry; good practice wood |
| Soft (red) maple | 30–120 | Fast but stain-prone; winter sawing |
| Hard (sugar) maple | 50–200 | Same warning as soft maple, slower |
| American elm | 50–150 | Dries okay, warps badly; weight the stack heavily |
| White ash | 60–200 | Straightforward; watch for stain in summer |
| Hickory | 60–200 | Shrinks a lot; checks if pushed |
| Black cherry | 70–200 | Forgiving, slight checking risk on wide boards |
| Black walnut | 70–200 | Seal ends immediately; the money’s in the ends |
| Beech / yellow birch | 70–200 | Warp and stain risk; heavy weight, cold-season start |
| Red oak | 70–200 | Plan on a full year to 15%; moderate airflow only |
| White oak | 80–250 | Slowest common hardwood; 8/4 can take 2–3 years |
| Eastern white pine | 60–200 | Usually done in one summer; blue-stains if dead-stacked |
| Southern yellow pine | 30–150 | Fastest of the lot in warm weather |
| Northern white / western red cedar | 60–200 | Low shrinkage, almost impossible to ruin |
Remember that these numbers get you to 20%, which is fine for framing and outdoor work. Getting from 20% down to the 12–15% range that air can reach takes another few months of good weather, because drying slows down as the wood gets drier and closer to the outdoor EMC. Thicker stock doesn’t scale linearly, either: 8/4 takes more than twice as long as 4/4, and 12/4 slabs are a multi-year project outdoors. We’ll cover the full stacking timeline in our dedicated air-drying how-to; this table is the planning number.
Moisture Targets: How Dry Is Dry Enough?
“Dry” depends entirely on where the wood is going to live. Match the target moisture content to the end use and you’ll avoid nearly every callback.
| End use | Target moisture content | Can air drying get there? |
|---|---|---|
| Interior furniture, cabinets, tabletops | 6–8% | No. Air-dry, then kiln or a heated shop for weeks to months |
| Interior flooring, trim, paneling | 6–9% | No. Same as furniture |
| Unheated shop, barn, or garage projects | 10–14% | Yes, most of the year |
| Exterior siding, decking, porch, fence | 10–14% | Yes |
| Framing lumber, timber frame, pole barn | 19% or under | Yes; that’s why 20% is the air-drying benchmark |
| Green woodworking, chairmaking, log building | Green to 30% | Not needed; work it wet |
Where we get burned is the middle: somebody buys “air-dried” 12% ash from us to build kitchen cabinets, the cabinets go into a furnace-heated house in January, the wood drops to 5% over the winter, and the doors shrink and the panels crack. That’s not a drying failure, it’s a mismatch. If the wood is going indoors, it needs to get to 6–8% before it’s cut to final size, period.
Reading Moisture: How to Know When It’s Done
Time tables are planning tools. A meter is the only way to actually know. Two kinds:
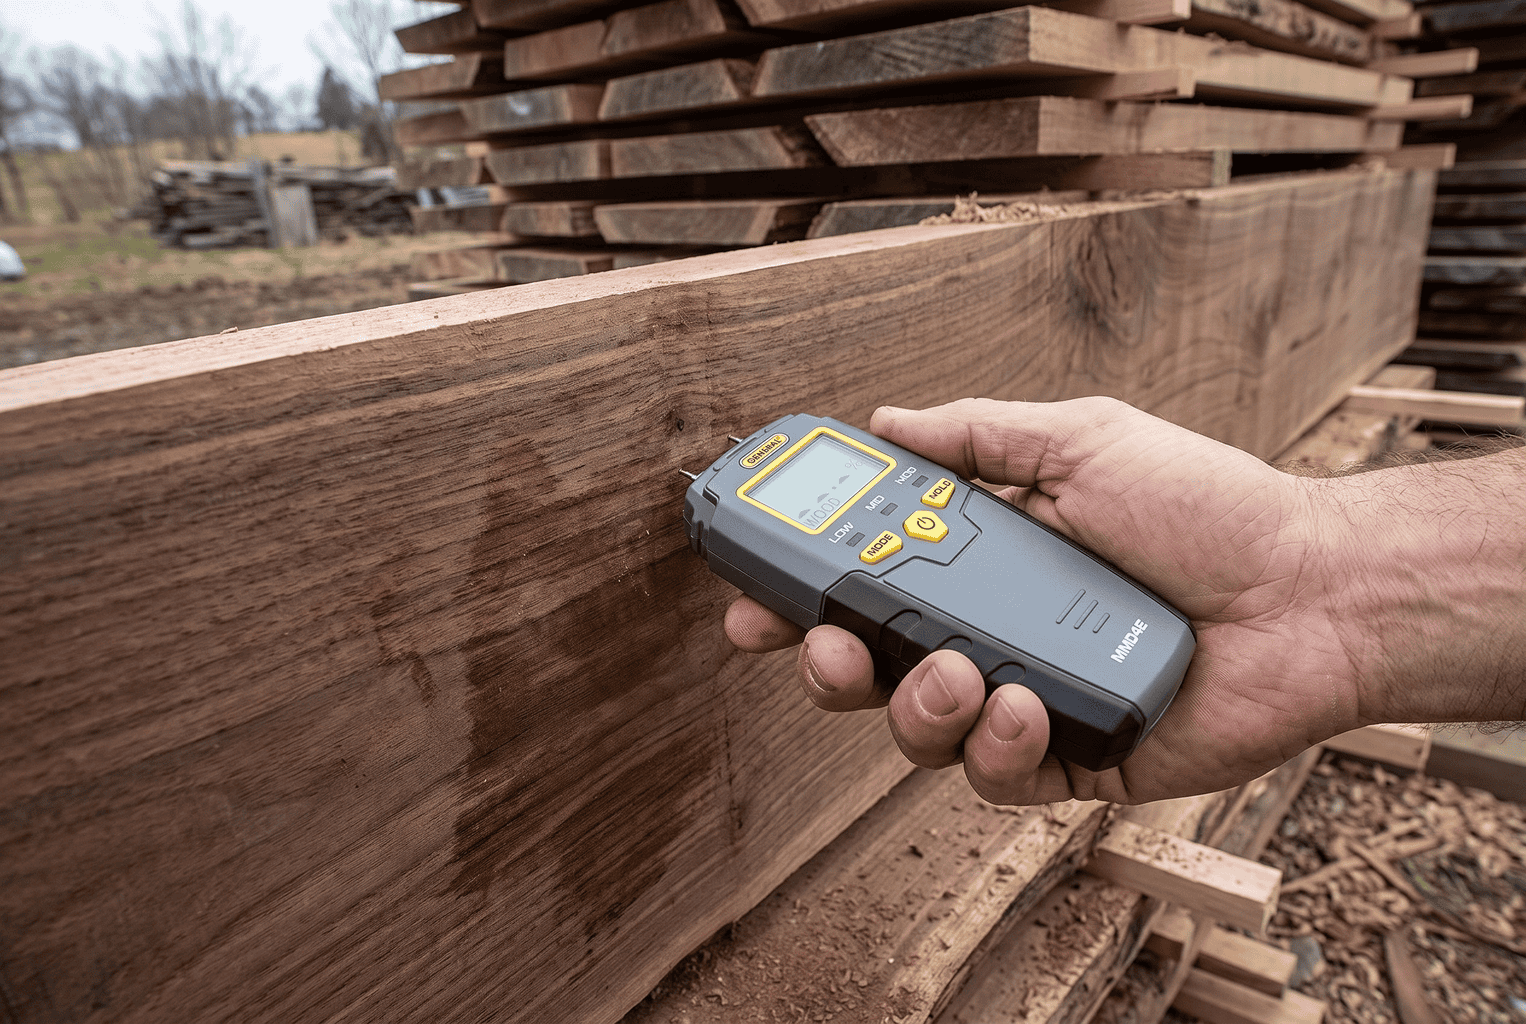
- Pin meters drive two pins into the wood and measure electrical resistance. They read at the depth of the pins, so on thick stock you need the long hammer-probe pins to see the core. They’re accurate in the 6–30% range, which is exactly the range that matters. Species correction is necessary; most meters have a settings table.
- Pinless meters read through the surface with an electromagnetic field to about 3/4 or 1 inch deep, don’t leave holes, and are fast for checking a whole stack. They read shallow, so a pinless meter on 8/4 stock will tell you the shell is dry while the core is still at 25%.
Our routine: check the stack monthly with a pinless meter on a dozen boards from the middle of the stack (not the top course, which is always drier), and when it reads in range, cut a sample board in the middle and read the fresh cross-section with a pin meter to confirm the core. If you have no meter at all, the oven-dry method works: weigh a small cutoff, dry it in a kitchen oven at about 215°F until it stops losing weight, and moisture content = (wet weight − dry weight) ÷ dry weight × 100. It’s slow but it’s the standard every meter is calibrated against. We’ll go deeper on choosing a meter in our moisture meter guide; for now, any name-brand pin or pinless meter in the $30–$150 range is good enough for a small mill. A basic pin meter like the General Tools MMD4E (reads 5–50% moisture content in wood through two stainless pins, with a separate drywall scale you can ignore) is the kind of thing to keep in the truck; an item like this on Amazon will tell you when a stack is done, and that is all it has to do.
Finishing the Job: Kiln Drying and Indoor Conditioning
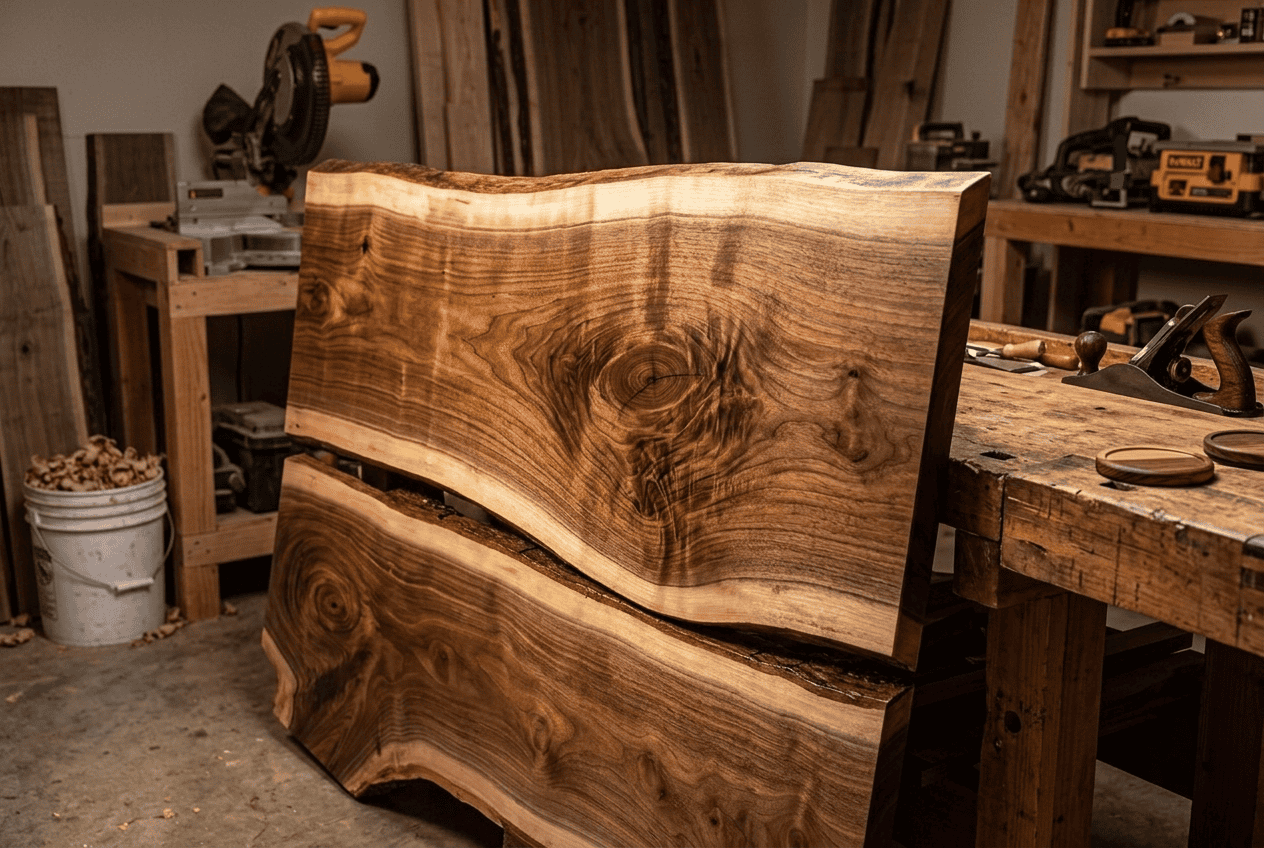
Once the stack is at 15–20%, you have three ways to get the last few points out of it.
1. Indoor conditioning. Move the stickered lumber into a heated shop or basement for the winter. Wood at 15% will settle to the indoor EMC (typically 6–8% in a heated space) in a couple of months for 4/4, longer for thicker stock. It’s free, it works, and it’s what we do with small batches for our own projects. The downside is it doesn’t kill bugs, and it doesn’t set pitch in softwoods.
2. Solar kiln. A solar kiln is a greenhouse with a fan: a south-facing glazed roof, a black interior, a fan to push warm air through the stack, and vents to dump moisture. The Virginia Tech design is the one most sawyers build; a 1,000 board-foot version costs a few thousand dollars in materials and will take 4/4 hardwood from green to 8% in roughly 6–10 weeks of summer sun, or take air-dried stock down in 2–4 weeks. Because it cools every night, it’s gentle on the wood and nearly impossible to over-dry with. The trade is that it’s slow in winter and stops entirely in a northern January.
3. Dehumidification kiln. An insulated box with a heater, a dehumidifier, and circulation fans. Commercial units from Nyle and others run a few thousand dollars for the DH unit alone and dry year-round with real control; plenty of sawyers build a DIY version out of a shipping container or a well-insulated shed with a household dehumidifier and a space heater. A 50-pint unit (rated for roughly 4,500 square feet in a house, which is far more than an 8-by-8 kiln box needs) like this one on Amazon is the size most DIY kiln builds run; drain it with the hose fitting so you are not emptying a bucket twice a day. A DH kiln finishes air-dried 4/4 hardwood in 2–4 weeks and, critically, can be run hot enough at the end to sterilize the load. The industry standard for killing powderpost beetles and other insects is holding the wood’s core at 133°F (56°C) for at least 30 minutes; most small operators run the kiln at 130–140°F for a full day to be sure. If you’re selling lumber to woodworkers, “kiln-dried and sterilized” is the phrase that gets you the price. It’s also the difference between hobby money and real revenue, which we broke down in how much you can make with a portable sawmill.
One warning that applies to every kiln: never put green lumber in a kiln and run it hot. Green oak dried fast at high temperature honeycombs, which is internal checking you can’t see until you plane or rip the board. Air-dry to 25% or below first, or run a proper schedule that starts cool and humid. We’ll do a full comparison of solar versus DH kilns for small operators in a separate article.
Drying Defects: What Went Wrong and How to Prevent It
Every one of these has happened in our yard at least once. The fixes are almost always in the stacking, not the weather.
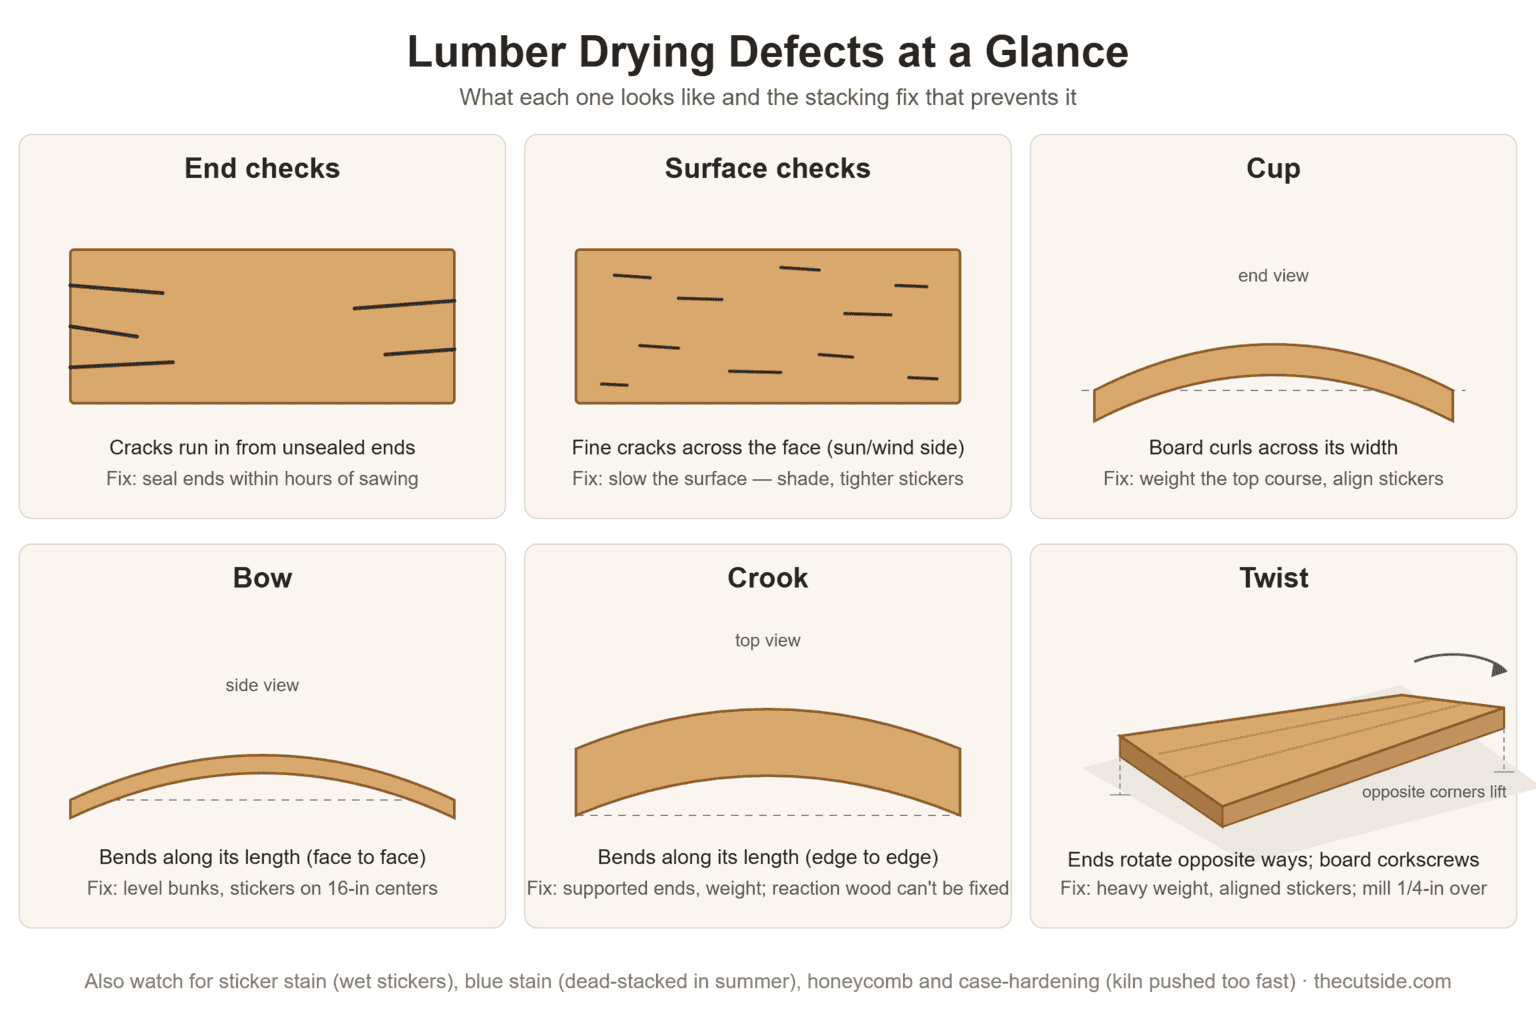
| Defect | What it looks like | Cause | Prevention / fix |
|---|---|---|---|
| End checks / end splits | Cracks running in from the board ends | Ends dry faster than faces; unsealed ends | Seal ends within hours of sawing; wider end stickers; sticker flush with the ends |
| Surface checks | Fine cracks across the face, usually on the sun/wind side | Drying too fast on the surface (oak especially) | Reduce airflow on that side, shade the stack, tighter sticker spacing; a board’s surface checks often close but don’t heal |
| Cup | Board curls across its width, usually away from the pith | Flat-sawn grain + uneven drying + no weight on top | Weight the stack, keep stickers aligned, quarter-saw wide boards, stack pith-side down on top course |
| Bow / crook / twist | Board bends along its length or corkscrews | Reaction wood, unsupported ends, offset stickers, sagging bunks | Level bunks, stickers on 16-inch centers and aligned, weight, mill 1/4 inch thick to allow planing |
| Sticker stain / sticker shadow | Dark or gray bands where stickers touched | Wet or green stickers; slow drying under the sticker | Dry stickers only, narrow stickers, cold-season stacking for whitewoods |
| Blue stain / gray stain / mold | Discoloration across sapwood, fuzzy growth | Fungus on wet boards in warm weather; dead-stacking; tarp on the pile | Same-day stickering, airflow, roof not tarp, saw whitewoods and pine in cold weather |
| Honeycomb | Internal checks visible only when planed or ripped | Kiln-drying green oak too hot too fast; severe case-hardening | Air-dry first; proper kiln schedule; can’t be fixed once it’s there |
| Case-hardening | Board pinches the saw or springs when ripped; shell dry, core wet | Surface dried and set before the core caught up | Slow the early drying; kilns fix it with a conditioning (steam/high-humidity) step at the end |
| Insect holes / frass | Small round holes with fine powder | Powderpost beetle, ambrosia beetle in sapwood | Remove bark, sterilize in a kiln at 133°F core, don’t store air-dried lumber next to firewood |
Two of these deserve a note. First, some warp is built into the tree. A leaning tree or a log with a big off-center pith is full of reaction wood, and no amount of stacking will keep those boards straight. Read the log before you saw it, and mill anything suspicious 1/4 inch over thickness so there’s stock to plane it flat later; the roadmap in our bandsaw mill operator’s handbook goes into reading a log for stress. Second, if you’re seeing wavy or uneven thickness on the boards before they even hit the stack, that’s a mill problem, not a drying one; see bandsaw mill troubleshooting for that.
Drying Thick Slabs and Live-Edge Stock
Slabs are their own animal. An 8/4 or 12/4 live-edge slab has ten times the value of a board and dries a lot slower and a lot less evenly, and every furniture maker who buys one will check it with a meter. Our slab rules:
- Seal the ends and the first 6–12 inches of both faces. Slabs crack from the ends across the face, and the wax on the ends alone isn’t enough.
- Use 1-inch stickers on 12-inch centers, and use more weight than you think: we stack slabs pith-side alternating and put 300+ pounds on top of a 4-foot-wide stack. Cupping on a 30-inch slab is measured in inches, not fractions.
- Plan on 2 years outdoors for 8/4 hardwood, 3 or more for 12/4, then a kiln or a full winter indoors to finish. Selling a slab at 14% as “dry” will come back to bite you when the customer’s table cracks.
- Leave the bark on if you’re selling the live edge, but knock it off if the slab is going to sit for years; bark holds moisture and beetles.
The payoff is real. A green walnut slab off the LT15 might bring a few dollars a board foot; the same slab kiln-dried, sterilized, and flattened brings a multiple of that. Drying is where a sawmill’s margin actually lives.
FAQ: Drying Lumber From a Portable Sawmill
What is the fastest way to dry lumber from a sawmill?
The fastest safe way is to air-dry the lumber on stickers down to about 20–25% moisture content, then finish it in a dehumidification or solar kiln. A DH kiln can take pre-dried 4/4 hardwood to 7% in two to four weeks. Trying to skip the air-drying step and kiln green oak hot from the start is the fastest way to ruin it with honeycomb and checking.
How long should wood dry after milling before you can use it?
For framing, sheds, and outdoor projects, 4/4 lumber needs to reach about 19–20% moisture content, which takes 2–6 months for pine and roughly 6–12 months for oak and other hardwoods. For anything going indoors, air-dry first and then get it to 6–8% in a kiln or heated space, which typically means a year or more from the sawing date for 4/4 hardwood and two-plus years for 8/4 slabs.
Can you air-dry lumber to 6–8% for furniture?
Not outdoors in most of North America. Air-dried lumber stops drying at the outdoor equilibrium moisture content, which is about 12–16% depending on your climate. To get furniture-grade lumber to 6–8% you need a kiln or several weeks to months of stickered storage inside a heated building.
Should I dry logs before milling them, or dry the boards?
Dry the boards. Logs dry extremely slowly and unevenly, and a log left sitting for a year usually ends up with stain, bugs, and end checks that cost you lumber. Saw logs as fresh as you can, seal the log ends if they have to wait, and get the boards on stickers the day they’re cut.
What happens if you build with green lumber from a sawmill?
The wood will shrink 6–8% across the width as it dries in place, and it’ll move in whatever direction its grain wants. For a rough pole barn or fence with nailed connections that’s usually acceptable, and timber framers deliberately work green. For anything with tight joints, glue, or flat panels, green lumber will cup, split, gap, and pull fasteners as it dries.
The Bottom Line
Drying lumber from a portable sawmill is not complicated, but it is unforgiving of shortcuts. Build a level foundation before you saw, sticker the same day with dry 3/4-inch stickers on 16-inch centers, seal the ends, roof and weight the stack, and match the site and season to the species. Then let time work: about a year per inch to get hardwoods to air-dry, faster for softwoods, and a kiln or a heated shop to finish anything that’s going indoors. Do that and the lumber that comes off your mill will be worth more than what you’d pay at the yard. Skip it, and you’ll learn the same lesson I did with that first stack of oak. If you’re still weighing whether a mill makes sense for your situation, our breakdown of what a portable sawmill really costs includes the drying setup you’ll need alongside it.
Written by Jason Lewis, ten-plus years running a Wood-Mizer LT15 on upper-Midwest hardwoods; every drying number here came off lumber stacked in his own yard.